Step-by-Step Guide on How to Use TuneCable Beatone
TuneCable Beatone aids users in retrieving audio content from various platforms and transforming it into standard formats. Let us nail down the detailed steps involved in converting music from a multitude of streaming services.
 Download User Manual - TuneCable BeatOne
Directory
Part 1. How to Register TuneCable BeatOne?
Note: Should you have not yet downloaded this TuneCable BeatOne, kindly click the button below to install instantly.
Step 1. Find the "Menu" button in the top right. Click it to unfold the menu list, tap on "Register". Another option is to click the "Register" button in the sidebar.
Step 2. After the purcahse, you will receive emails including a license. Copy and paste the registration Email and Code into the registration box, and tap on the "Register" button to activate the license.
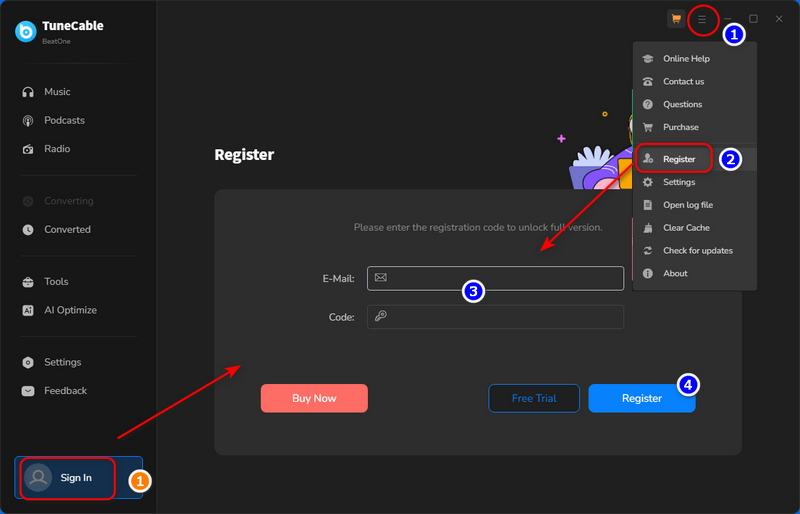
Note: The registration info is case-sensitive. And, please do not add a blank at the beginning or the end of the word.
Part 2: How to Use TuneCable BeatOne
TuneCable BeatOne retrieves music from a variety of sources using three distinct methods. The details are as follows:
- Download music from the App: Spotify, iTunes/Apple Music, Amazon Music, Tidal.
- Download music from the Web player: Spotify, Apple Music, Amazon Music, Tidal, YouTube Music, Line Music, Qobuz, Pandora.
- Record music from the Website: Audible, Dailymotion, YouTube, Vimeo, SoundCloud, and more websites by manually inputting URLs.
Let's follow the detailed instructions to download music via differents methods.
Part 2.1: Download Music from the Music App / Web Player
Step 1: Select Music Source
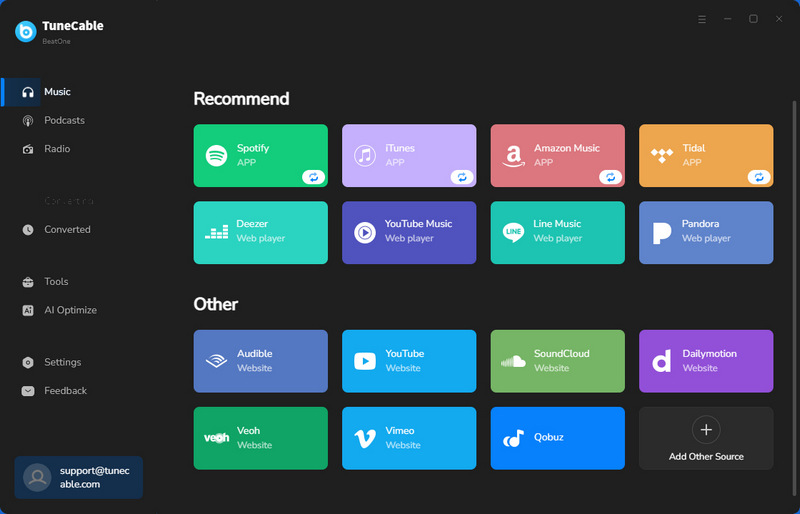
After the installation of TuneCable BeatOne, launch it on your computer. On the primary interface, top music streaming music platforms are displayed.
If you are inclined to high-quality music extraction, you can download music from the app. When recording music from Spotify, Apple Music/iTunes, Amazon Music, and Tidal Music, you are allowed to extract songs from the app. If you download music from the web player, the download speed will be faster.
We take Spotify Music as an example.
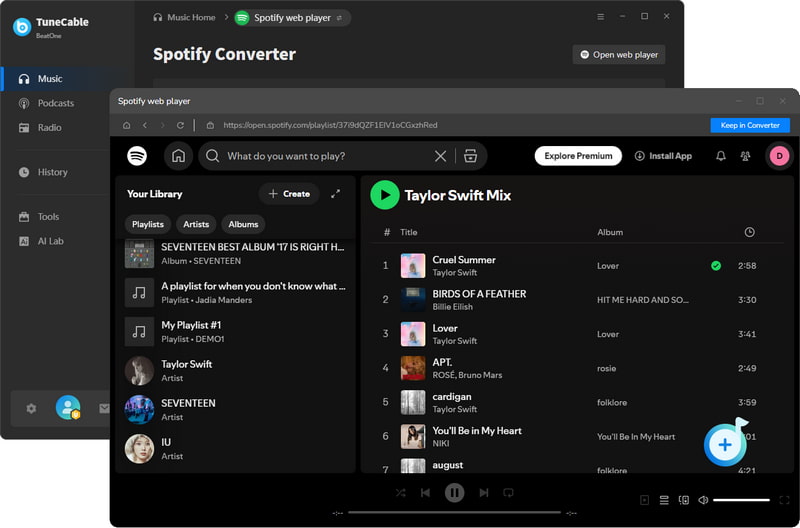
Click on the "Spotify" tag on the primary interface. Go to the top navigation bar and switch to "Spotify web player" or "Spotify App".
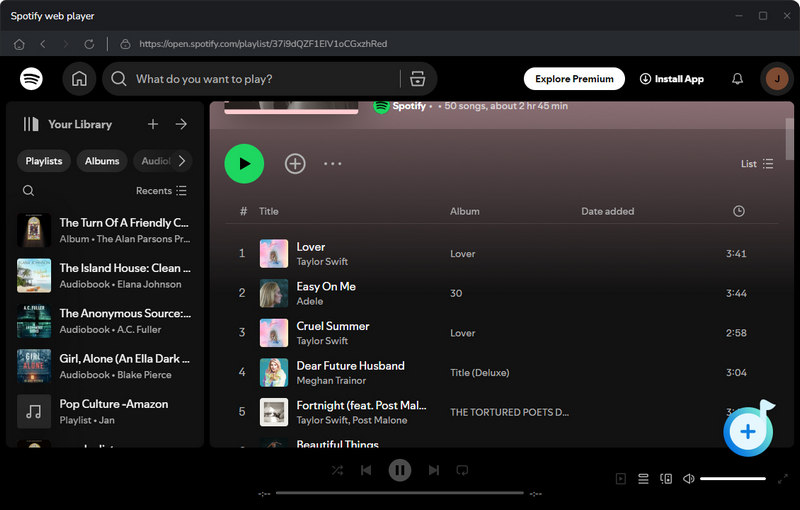
After that, the pre-installed Spotify Music app or web player will pop up. Log into Spotify Music. (Tip: A free account is feasible to download music via TuneCable if the streaming music platform offers a free plan for the audience.)

Step 2: Add Music to Queue for Download
Browse for a desired song, album, or playlist and click on its title. Three methods are feasible to add songs:
- Drag or drop a song, album, or playlist from the music app to TuneCable and start parsing. (Only feasible when downloading music from the app.)
- Right-click the "three dots" icon next to a track, album, or playlist and choose to copy its URL in the pop-up menu. Then paste the URL into the TuneCable parse box.
- Open a track, album, or playlist, and then tap on the "Click to add" button in the lower right.
Extra Tips: The Spotify web player is set to be embedded within the converter. When you click "Pop out Player", the embedded web player will pop out as another window. Conversely, when you click "Keep in Converter", the pop-up window will be embedded back into the converter. You can adjust it according to your own usage habits.
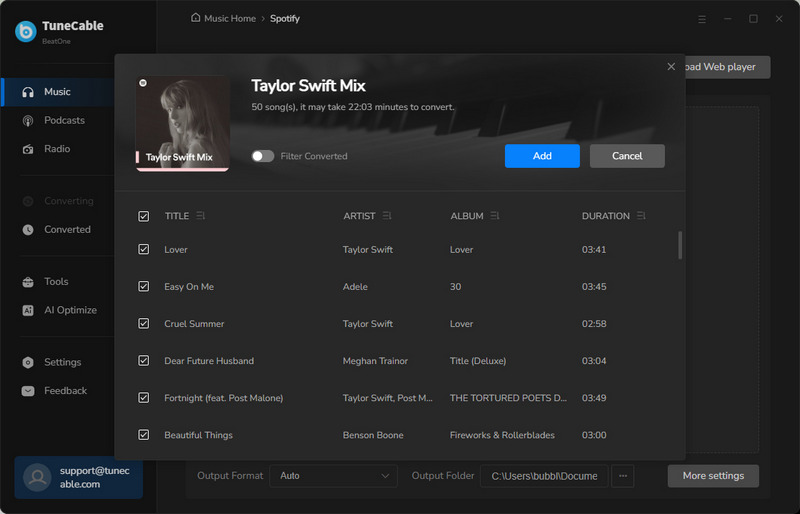
TuneCable will list all tracks after parsing the link. Tick off your desired items and click on "Add".
Step 3: Customize Output Settings
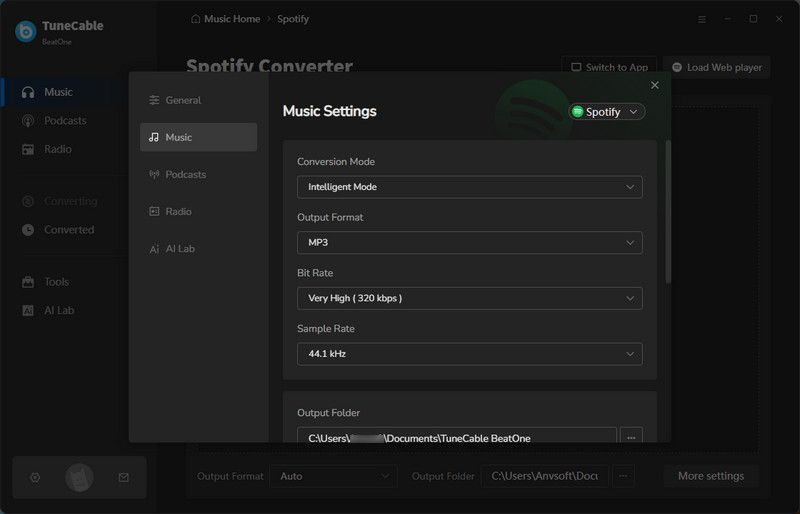
In the left sidebar, go to the "Settings" button. Select the options you prefer and the changes will be applied automatically.
- Conversion Mode: Intelligent Mode, Record Mode, YouTube Mode
- Output Format: Recommended, MP3, AAC, FLAC, WAV, AIFF, ALAC, EAC3, AC4
- Bit Rate: 128kbps, 192kbps, 256kbps, 320kbps (available for MP3, AAC)
- Bit Depth: 16 bit, 24 bit (available for WAV, AIFF, ALAC, FLAC)
- Sample Rate: 44.1kHz, 48kHz, 96kHz, 192kHz
- Output Folder: To your preference
- Output File Name: Track Number, Title, Artist, Album, Playlist Index, Year, Disc Number
- Output Organized: None, Playlist, Artist, Album, Artist/Album, Album/Artist, Playlist/Artist, Playlist/Album, Year
- After Converting: Do nothing, Open the output folder, Put the system to sleep
Here you can also change settings for Podcasts, Radio, and AI Lab.
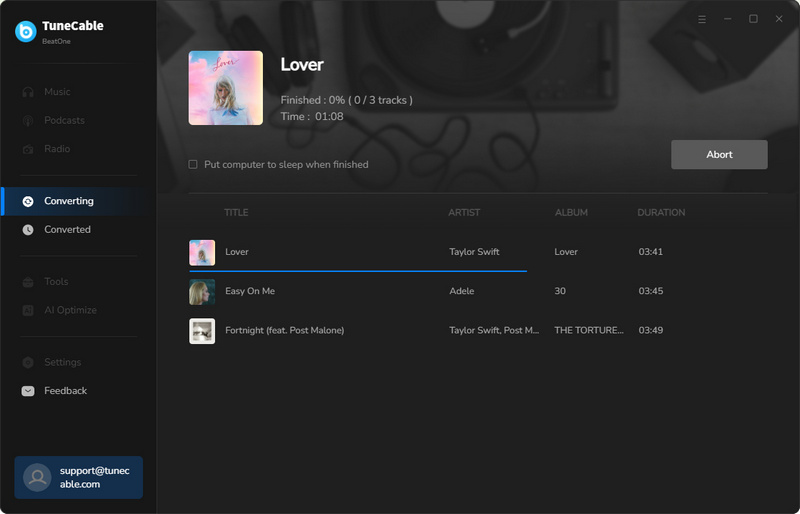
Step 4: Download Music as Local Files
Click on "Add More" if you decide to queue more songs. hit the "Convert" button if you quit adding more tracks, albums, or playlists.

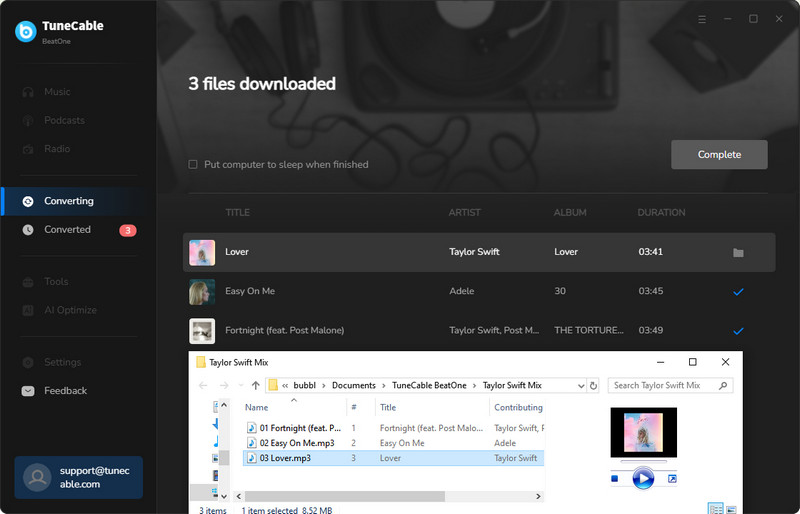
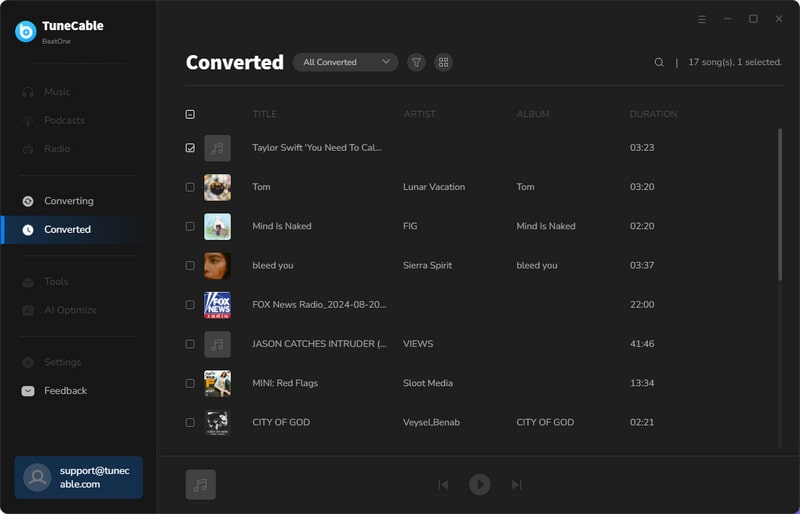
Step 5: Check the Downloaded Music Files
Moving the pointer cursor to any track and clicking the "folder icon" will orient you to the saving location. Besides, the download history can be checked under the "History" column.
Step 6: Switch to Another Music Platform
If you want to download music from other platforms, click the "Music Home" at the top left to return to the start-up interface and start over.

Part 2.2: Record Music from the Website
Step 1: Select Music Cource or Add Custom Website
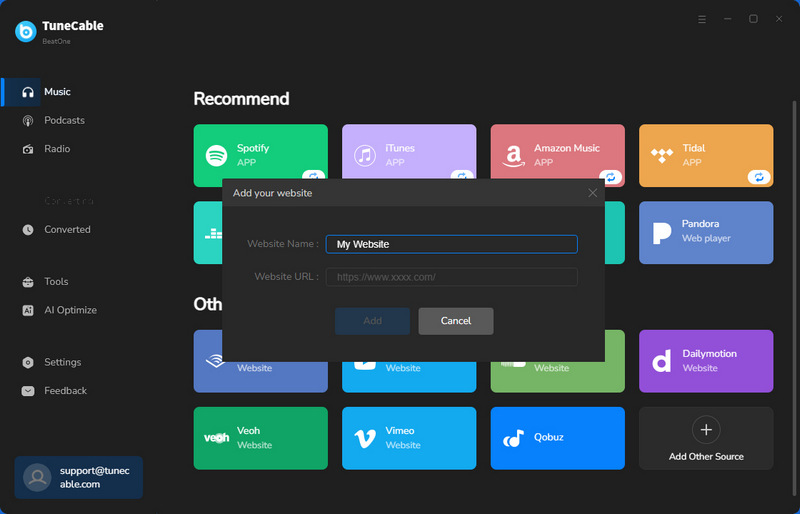
Start TuneCable BeatOne after the installation. On the start-up interface, navigate to Audible, Dailymotion, YouTube, Vimeo, BBC Sounds, Bandcamp, or SoundCloud.
If you could not find the wanted platform, scroll down to the next page and click on "Add Other Source". Input a name and URL to generate a custom entry.
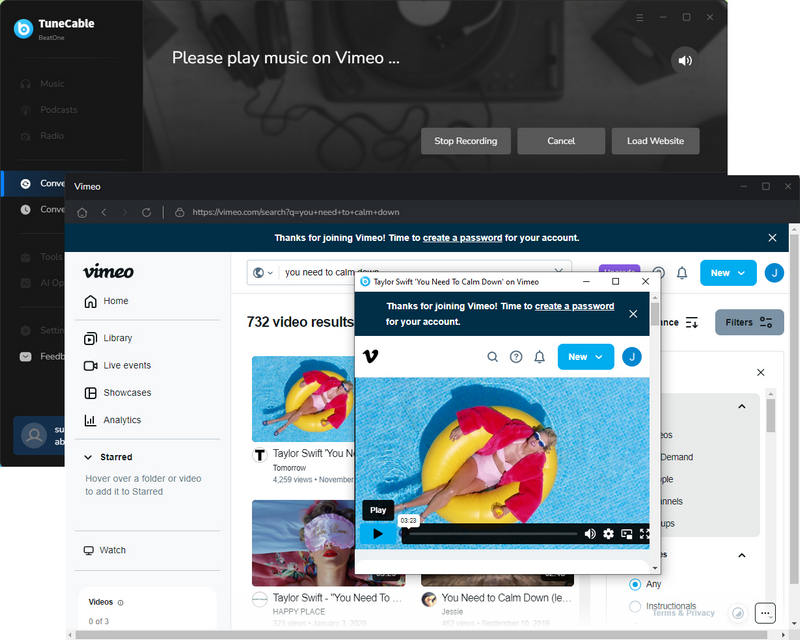
Let's take Vimeo as an example. Click "Vimeo" to activate the embedded Vimeo Website. Find your wanted tracks in the Vimeo Website.
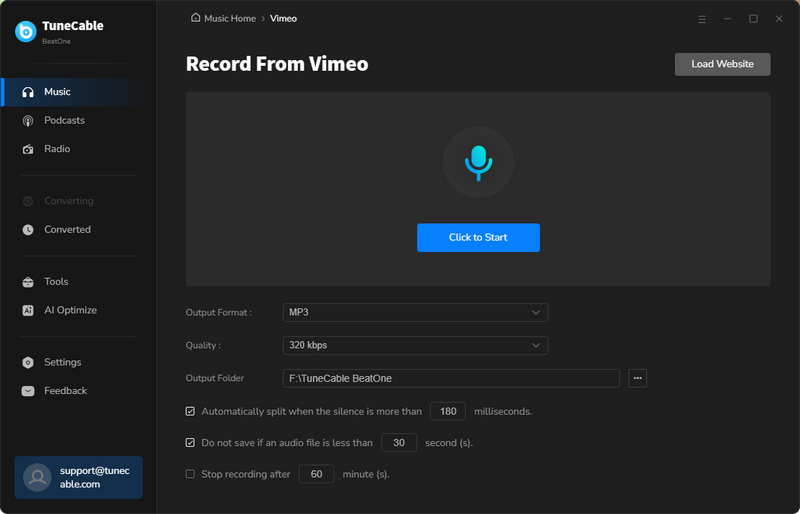
Step 2: Customize the Output Settings
Click "Settings" to alter the "Ouput Format" and "Quality". Additionally, according to your specific requirements, you may opt to enable the software's automatic detection of playing audio, accompanied by selected processing tasks such as automated trimming of lengthy recordings, filtration of excessively brief clips, or programming it to cease recording upon reaching a predetermined duration. Simply mark the checkboxes corresponding to your desired choices.
- Output Format: MP3, AAC, FLAC, WAV, AIFF, ALAC
- Quality: 128kbps, 192kbps, 256kbps, 320kbps (available for MP3 and AAC)
- Output Folder: To your preference
![]() Record Settings:
Record Settings:
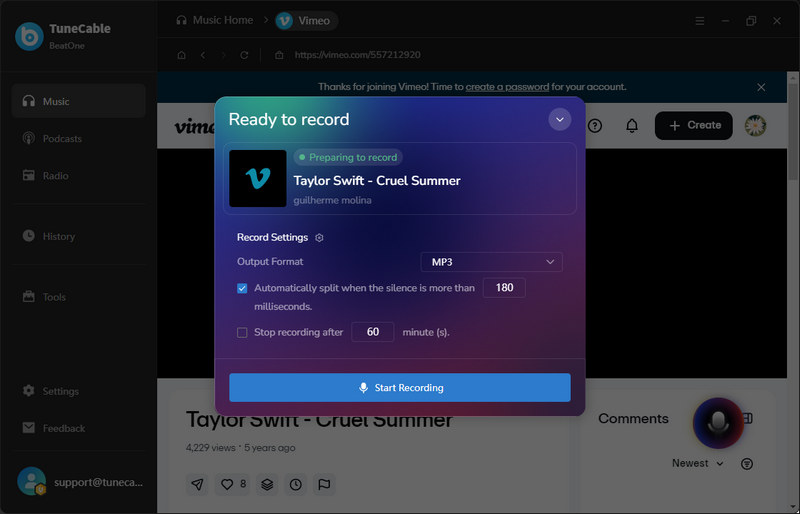
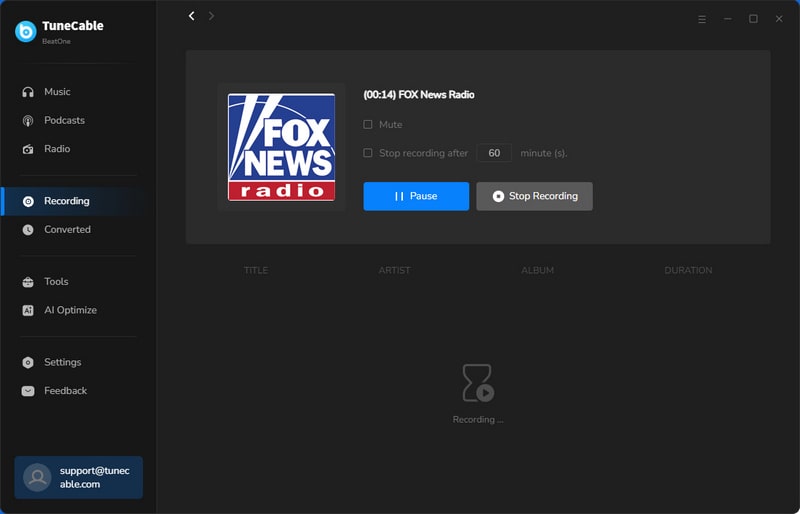
Step 3: Start Recording Music
Please log in to your account and open the music you wish to record. Subsequently, initiate the recording by clicking the "Click Start to record…" button in the lower right. Hit "Start Recording". Then play the music to activate recording. TuneCable will automatically start recording upon detecting the music and stop when the song ends, ensuring you don't miss a second. Additionally, it will intelligently separate each track and retain the song's metadata.
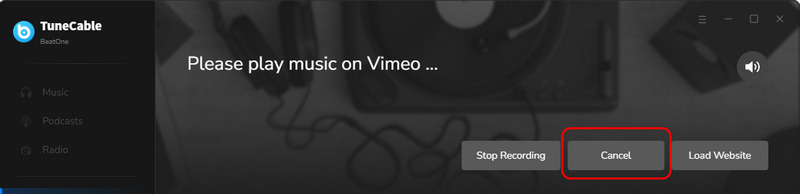
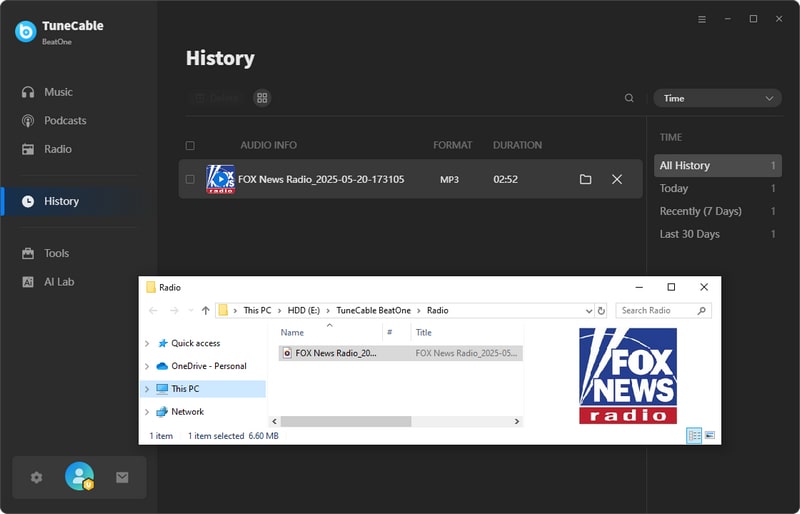
Step 4: Check the Downloaded Music Files
Upon completion of the recording, click "Stop Recording". The recorded song will then be automatically saved to the output path you have designated.
Navigate to the "History" column to view your download history. The "folder icon" adjacent to each track will guide you to its respective output folder.
Step 5: Return to the Main Interface
If you want to download music from other platforms, just go to "Music Home" in the upper left and choose another platform to download music.

Part 2.3: Free Podcasts Channel - How to Download
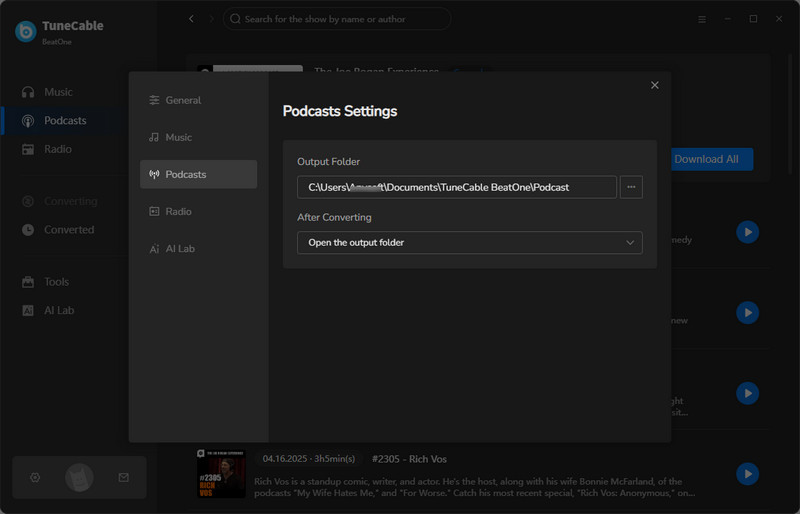
Step 1: Go to the "Settings" section and choose "Podcasts" to change the output folder.
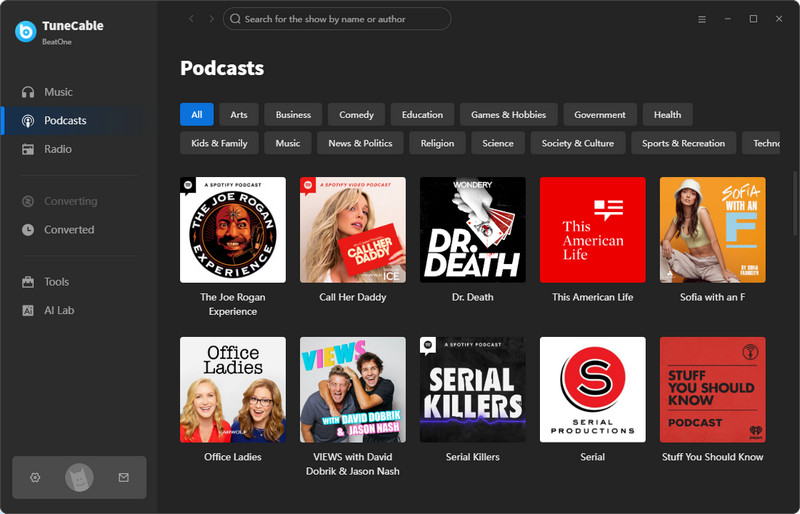
Step 2: Go to the "Podcasts" section and choose a podcast via genre filter. To quick locate a preferred podcast, input keywords in the search box.
Note: When hovering over the podcast's cover, you can hit the "play" button to stream the podcast. Or click the heart icon in the bottom right corner to add this podcast to your "My Favorites" list.
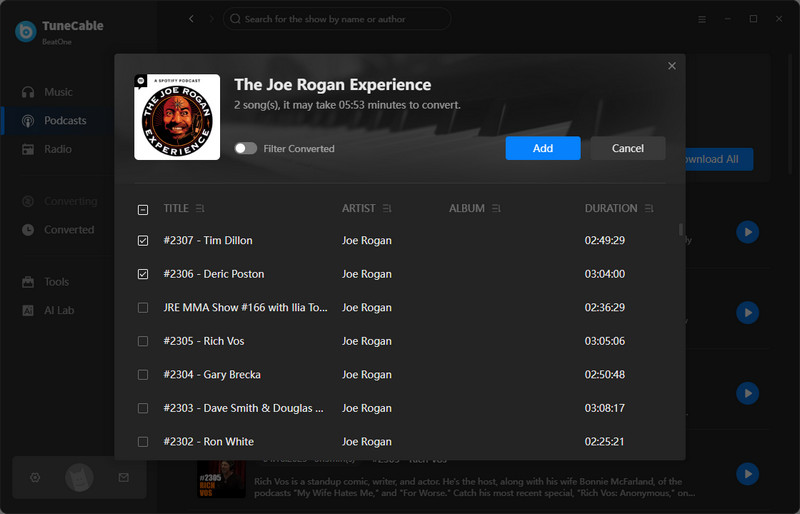
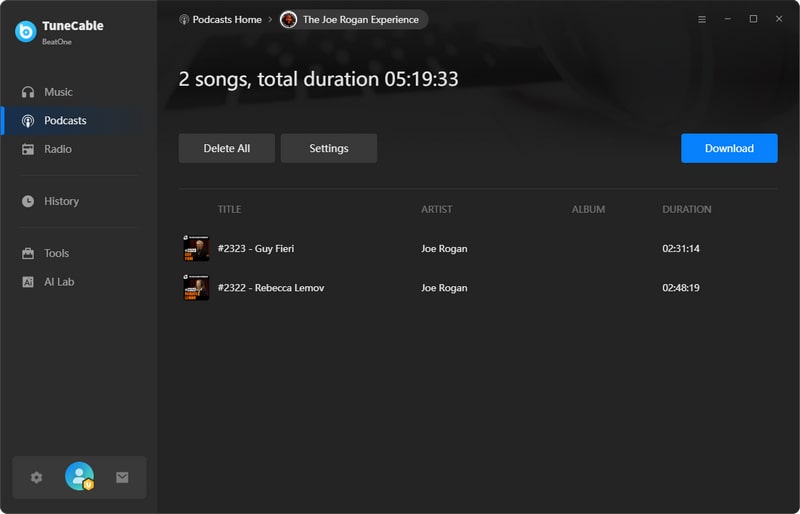
Step 3: Locate the podcast you want, hit the download icon, tick the needed episodes, and hit "Add" to move them to download list. Then, click "Download".
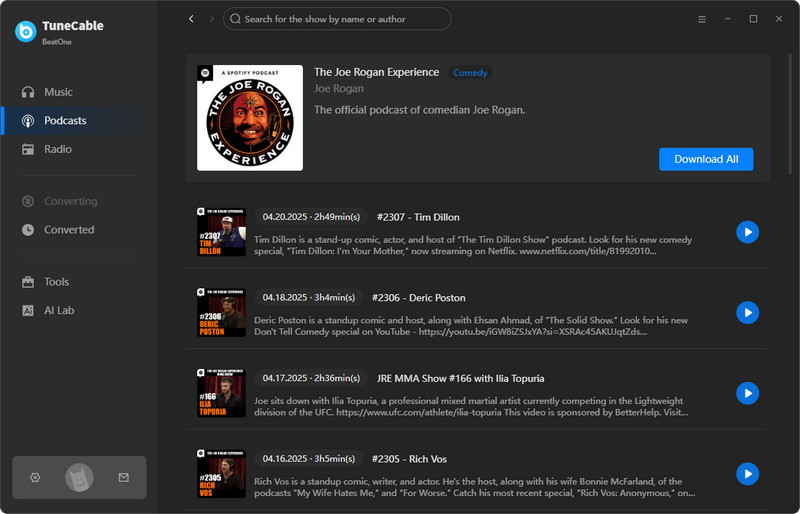
Note: When clicking the empty space on the podcast cover, you'll be directed to a detailed page with multiple download buttons next to each episode. Here, you can click the download button to download one single episode or hit the "Download All" button to download the entire podcast collection in bulk.
Step 4: Upon completion of the conversion, the output folder will pop up to give you quick access to the downloaded podcasts. Furthermore, navigate to the "History" section where you can view your download history.

Part 2.4: Free Radio Channel - How to Record
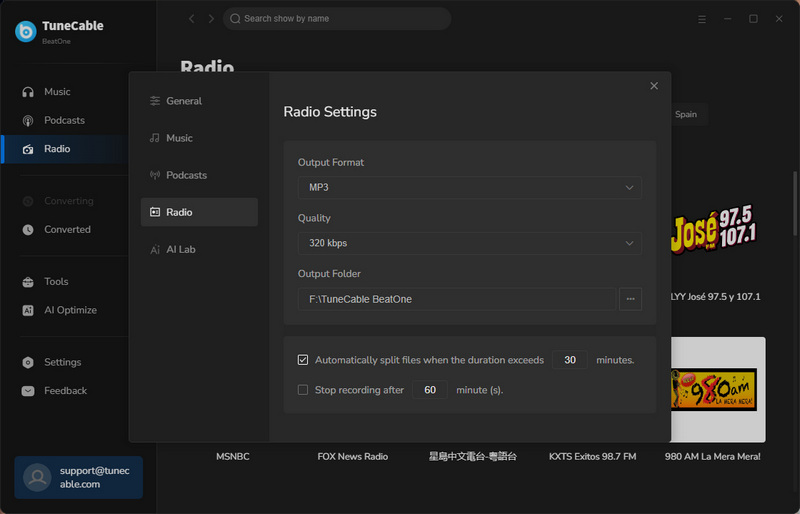
Step 1: Go to the "Settings" section and choose "Radio" to change the output folder saving path, output format, quality, and other parameters.
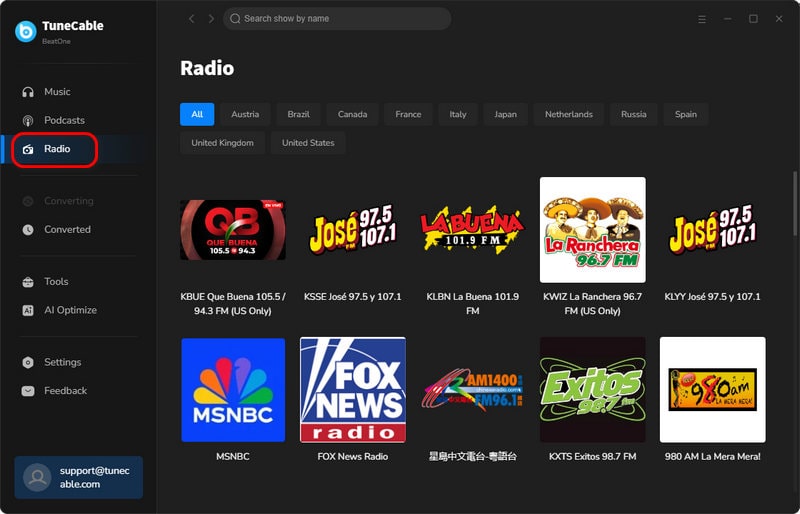
Step 2: Browse for radio shows you want under the "Radio" channel. Click the blank space on any radio cover.
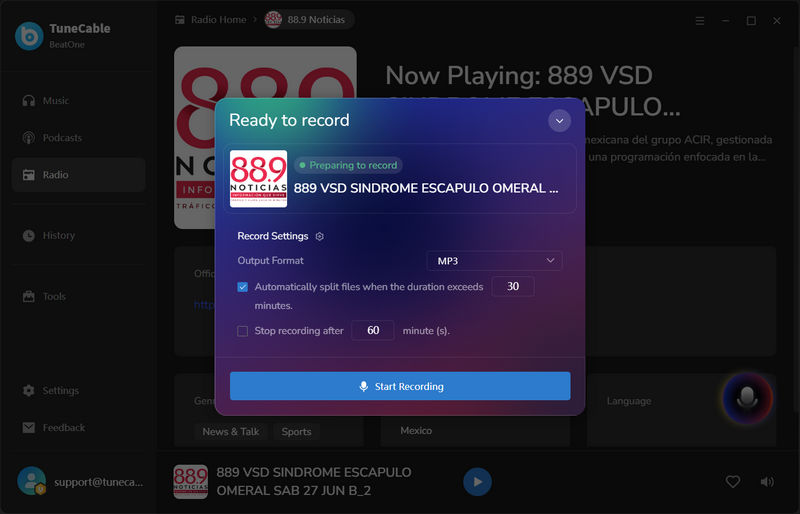
Step 3: Hit the "Click Start to record…" and "Start Recording" button to activate the task.
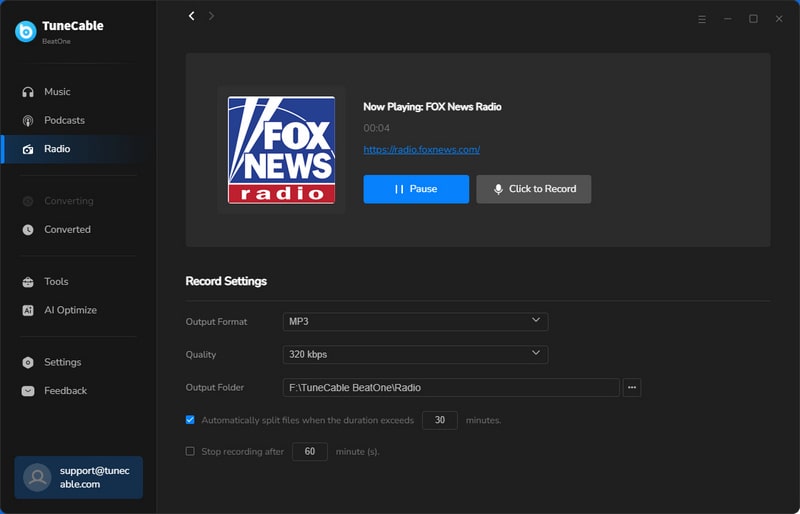
Step 4: When finished, click the "Recording" button in the lower right and hit "Stop Recording". Finally, locate the downloaded shows in the "History" section.
Part 2.5: Notes on Custom Output Settings
1. After selecting different output formats, the options for bit rate and sample rate will be different.
2. When choosing "Record Mode" as the conversion mode and the "Recommended" option in output format, TuneCable can intelligently help export music in original quality and format.
3. To download music from an app or web player, use Record Mode. If your network connection is unstable, switch to YouTube Mode to download the same song from YouTube. Intelligent Mode means TuneCable automatically switches between downloading music from xxx app/web player or YouTube.
4. If you choose to download one or more playlists without changing the order of each track, access "Settings" in lower left of TuneCabe main interface. Under "Output File Name", retain only "Playlist Index" and "Title". Head to "Output Organized", select "Playlist". Then the converted playlist will be saved in its original order.