

TuneCable iTadal Music Converter
 >
How To >
Tidal Music Tips >
Tidal paid users can easily unlock offline listening after downloading the wanted tracks. However, it's futile when it comes to transferring the downloaded Tidal files to other devices by any official means. Despite subscribing to Tidal, you are confined to playing music within the Tidal Music app or web player. Downloading music from Tidal to a USB flash drive for further use is unattainable unless you follow the solution put forward in this article.
Tidal subscribers can cache songs for offline listening whereas they are obstructed from moving the cache files to other devices like a USB flash drive for free playback. Therefore, are you wondering how to download music from Tidal to a USB flash drive? This post will provide tricks on how to download the Tidal songs, albums, and playlists to a USB flash drive with a Tidal plan and then enjoy unlimited playback forever.

Similar to other streaming music platforms, Tidal mainly aims at streaming music online. Referring to offline playback, there are strict rules. Firstly, you need to become a paid subscriber to Tidal. Secondly, offline playback is only permitted within the Tidal music app or web player. Thirdly, the downloaded files from Tidal are digitally encrypted. Even if you manage to copy and transfer the Tidal offline downloaded files, they are not supported to be played. Only the best-laid plan in part 3 can help you out.
According to the Tidal users, we collect some top reasons that they want to transfer the Tidal songs to a USB flash drive:
TuneCable iTadal Music Converter bypasses the digitally encrypted rules and lays a flawless conversion to Tidal Music files. It downloads Tidal songs, albums, and playlists to local files whilst decrypting them to common formats with the full ID3 tags (title, artist, album, track num, year, etc.) and authentic audio quality retained.

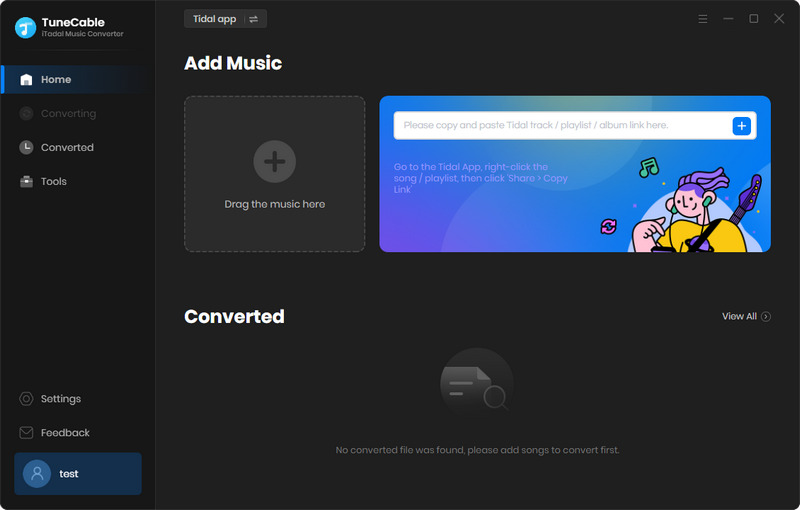
Step 1: Run TuneCable iTadal Music Converter and Tidal.
Check if you've installed both TuneCable iTadal Music Converter and the Tidal Music app on your computer. Launch TuneCable, and therewith the Tidal Music app will start automatically.
Step 2: Choose the Wanted Songs/Albums/Playlists from Tidal to TuneCable
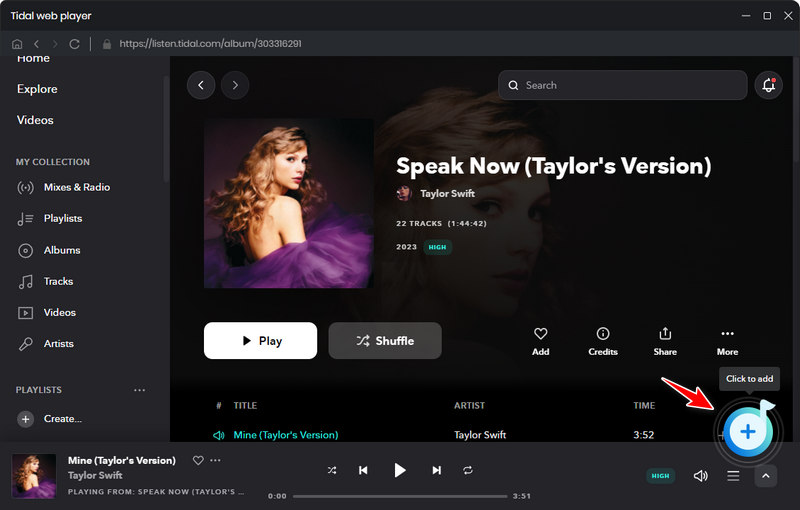
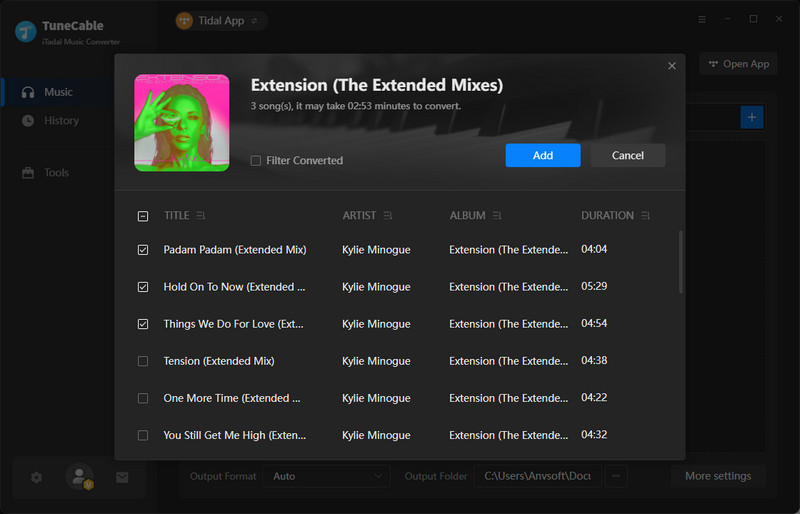
On the Tidal Music app, have a look at the music library and lock your goal. Find the song, album, or playlist you like, and click the "Click to add" button to parse. Soon afterward, TuneCable reads and loads songs from the URL. Check the needed tracks and click "Add". It's noted that you may want to delete or add songs before the conversion. You are supported to do it right now.
Step 3: Set Up the Output Parameters
For new users, the output parameters should be adjusted accordingly. There is a "Settings" button above the TuneCable working area lying in the lower left corner. Give it a hit and a pop-up setting window appears.
⭐ Changeable Output Settings: Conversion Mode / Output Format / Bit Rate / Sample Rate / Conversion Speed / Output Folder / Output File Name / Output Organized (way).
⭐ Tips You Should Pay Attention: When considering downloading Tidal tracks in master quality, you should select "Tidal Record" in the "Conversion Mode" setting, and choose "AUTO" in the "Output Format" setting. The "AUTO" option will help you extract songs from Tidal with the original quality kept. One more thing, to store all songs in one folder at one time, go to "Output Organized", and select "None".

Step 4: Download Tidal Music to Local PC
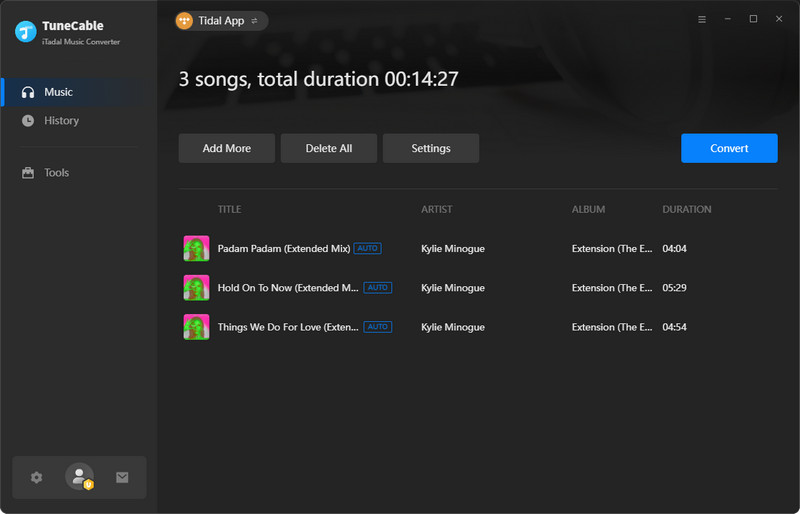
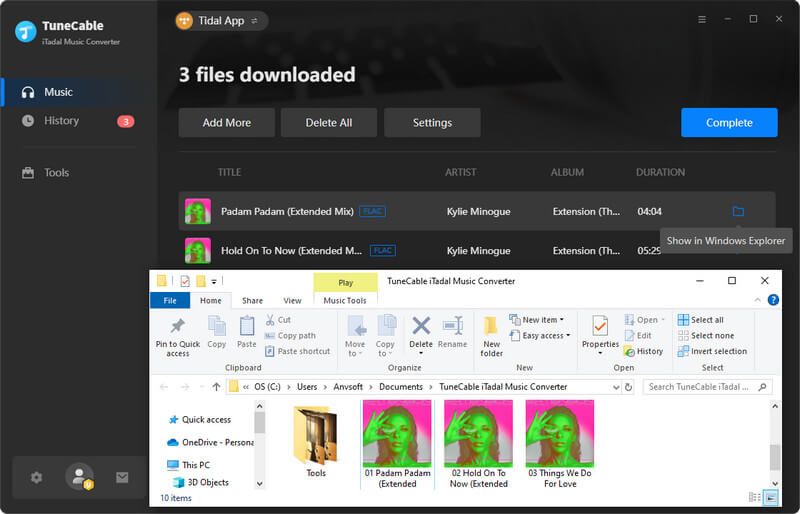
Eventually, tap on the "Convert" button to proceed with a batch conversion instantaneously. The Tidal songs will be saved as local files in the common formats you've set before. You can check the downloaded Tidal tracks on the local computer after the conversion. The output folder will open automatically once the conversion is done. You may want to check the next step to move the Tidal files to your USB flash drive.
Things get easier in this part as you have downloaded the Tidal songs to the local computer in common formats. Then we plan to move the downloaded Tidal Music files to a USB flash drive and play Tidal songs freely on other devices via a USB flash drive. Here are the detailed steps below:
Step 1: Just plug the USB flash drive into your computer. It will be recognized immediately afterward.
Step 2: Open the USB flash drive. Navigate to the output folder where the converted Tidal audio are stored on your computer. Then copy and paste them to the USB flash drive.
Step 3: It takes a while to complete the transfer. After that, you can take this USB flash drive with you and relish the offline playback anywhere and anytime.
⭐ Tips: What to do if USB data is lost? Try Syncios D-Savior! Syncios D-Savior is an expert in recovering data from disks, partitions, hard drives, SD cards, and other external devices. It is the best data recovery tool to rescue any data on PC.
The Verdict: According to this post, TuneCable iTadal Music Converter is the optimal solution for transferring Tidal music to a USB flash drive. For all kinds of Tidal users, the method is feasible. Furthermore, TuneCable can extract Tidal Music tracks with the lossless master quality preserved. Start a free trial now!
 What's next? Download TuneCable iTadal Music Converter now!
Download music tracks from Spotify, Amazon Music, Apple music, YouTube Music, TIDAL, Deezer, etc.

Recover lost 1000+ types of files from disks, partitions, hard drives, SD cards, and other external devices.