

TuneCable Spotify Downloader
 >
How To >
Spotify Music Tips >
Music has the extraordinary power to transport us to another world. However, experiencing music doesn't stop at just our ears anymore. With the rise of digital streaming platforms like Spotify, we can now elevate our musical experience by adding stunning visuals to the mix. Spotify, the world's largest music streaming platform, has always aimed to push the boundaries of the user experience.
The Spotify music visualizer revolutionizes how we perceive and connect with music. It adds an extra dimension that only amplifies the emotional impact of the songs we hold dear. Whether you're a casual listener or a dedicated audiophile, the ability to visualize music takes your Spotify experience to new heights. In this article, we will delve into the top 13 free-to-use Spotify music visualizers that can add visuals to your Spotify experience and elevate your music listening experience to new heights.
A music visualizer is a real-time graphical display that reacts to and interprets audio or music. It is a software or hardware tool that analyzes the audio input and generates animated visuals based on different frequency bands, amplitude levels, beat detection, or other audio features. These visuals can vary from simple bar graphs or waveforms to complex and intricate animations or 3D graphics. Music visualizers enhance the audio-visual experience by providing synchronized visuals that complement the sound and create a more immersive or entertaining effect. They are often used in music players, music production software, live performances, or as standalone visualizer programs or apps.
Meanwhile, Spotify, the largest music streaming service, is focused by many music visualizers. Typically, Spotify visualizers use the audio spectrum data from the Spotify app or the web player to create visuals. The audio spectrum contains information about various frequencies present in the audio, such as bass, midrange, and treble. Visualizers analyze this data and generate corresponding visual effects to match the Spotify audio. The specific visual effects and customization options can vary depending on the visualizer application or extension being used.
It's important to note that Spotify does not have an official built-in visualizer, so users need to rely on third-party solutions to access this feature. Simply follow us to read the next part and find the best Spotify music visualizer.
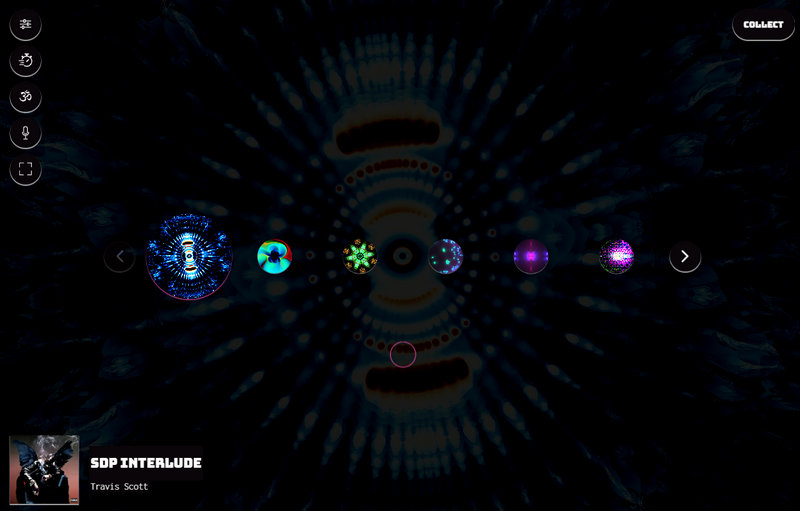
Kaleidosync is a free online music visualizer that allows you to sync your Spotify account with visual animations that react to the music. It works by analyzing the audio data and translating it into captivating and mesmerizing visual patterns, often resembling kaleidoscopic effects. You can customize the visual settings, colors, and effects to personalize your visualizer experience with the buttons in the upper left corner.
Step 1 Open a web browser and go to the Kaleidosync website at https://www.kaleidosync.com/.
Step 2 Select Spotify and log into your Spotify account to allow the visualizer to read data.
Step 3 Pick and play a Spotify song on the app or the web player.
Step 4 Pick a visualization on this online tool, and make more customizations as you like, then enjoy Spotify music visualization.
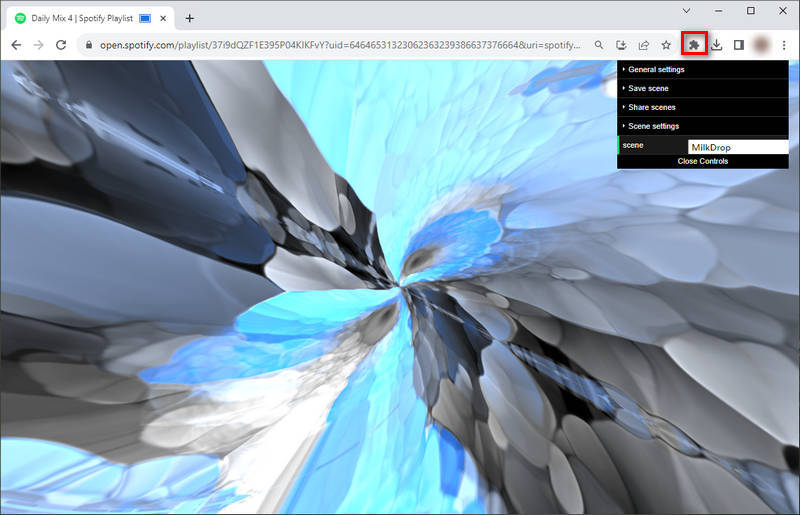
AudioVisualizer is a free Google extension that can be applied to visualize any music streamed within the Google browser, including Spotify. It analyzes the audio waveform, frequencies, and other audio parameters, and converts them into visual patterns, shapes, colors, or animated effects in real-time. Besides, it offers different settings that allow you to customize the visualization. Move to the upper right and you can change the settings as needed.
Step 1 Install the AudioVisualizer extension on your Google at the extension store.
Step 2 Open the Spotify web player, log into your account, and play a Spotify song.
Step 3 Click the Google extension icon to select AudioVisualizer, and it will visualize your Spotify songs.
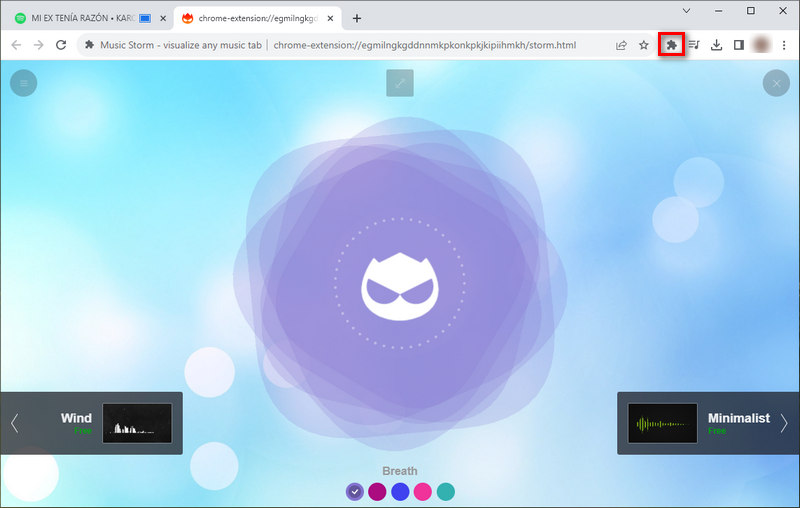
Music Storm is another reliable music visualizer. It is set to be a free Google extension too. This extension is compatible with not only Spotify but also YouTube Music, SoundCloud, etc. It has a simple design and is very easy to navigate, you can pick a visualization effect and switch colors with this visualizer.
Step 1 Install Music Storm to your Google extension at the extension store.
Step 2 Open your Spotify web player, log in to your account, and play a song.
Step 3 Click the Google extension icon to launch Music Storm and you will get visuals of your Spotify music.
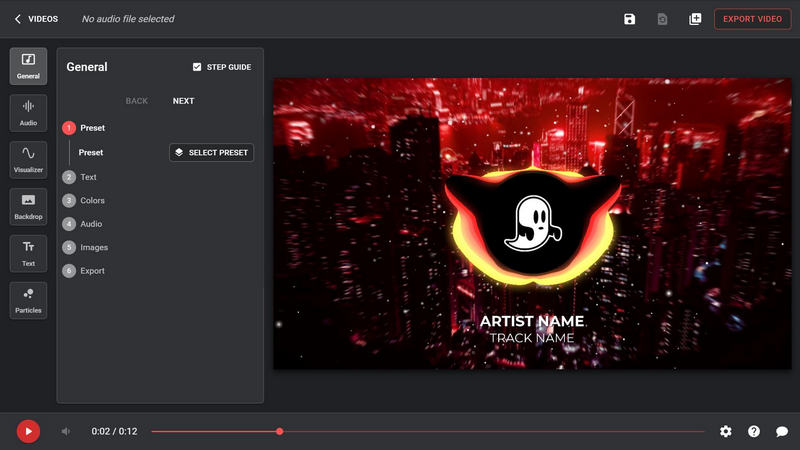
Specterr is a multi-functional online music visualizer. This tool allows you to upload your local audio and get visuals. Besides, you are offered features to edit the visualizer's color, shape, motion, and effects, and export the visualized videos. This online tool has both free and premium versions with different benefits, pick the one you need.
Step 1 Open Specterr with https://specterr.com/ on your web browser and select "CREATE A VIDEO".
Step 2 Select a preset as a starting point for your video.
Step 3 Upload your local Spotify MP3/WAV audio and get a visualization preview on Specterr. (👉 How to download Spotify music? See Part 4.)
Step 4 Customize this visualized video and export it if needed.
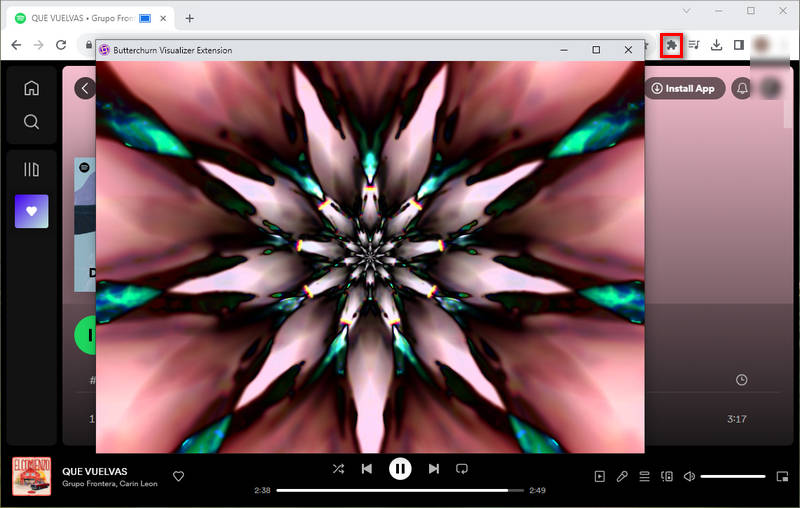
ButterChurn Visualizer is a free online visualizer that can visualize your local audio files with rich effects. Besides, this visualizer has a Google extension. With any music streaming website opened like Spotify and a song played, ButterChurn analyzes the audio and brings you visual enjoyment. During the playing process, ButterChurn automatically switches the visualized effects, sometimes it is a line, and sometimes it is a kaleidoscopic effect. One of the shortcomings is that this visualizer extension does not offer customizations.
Step 1 Head to ButterChurn at https://butterchurnviz.com/.
Step 2 Click on the music icon in the lower left, and select to upload your local audio to play.
Step 3 You can also click to add it as a Google extension, then play Spotify songs from its web player to get visualization.
Compatibility: Windows 7 and above
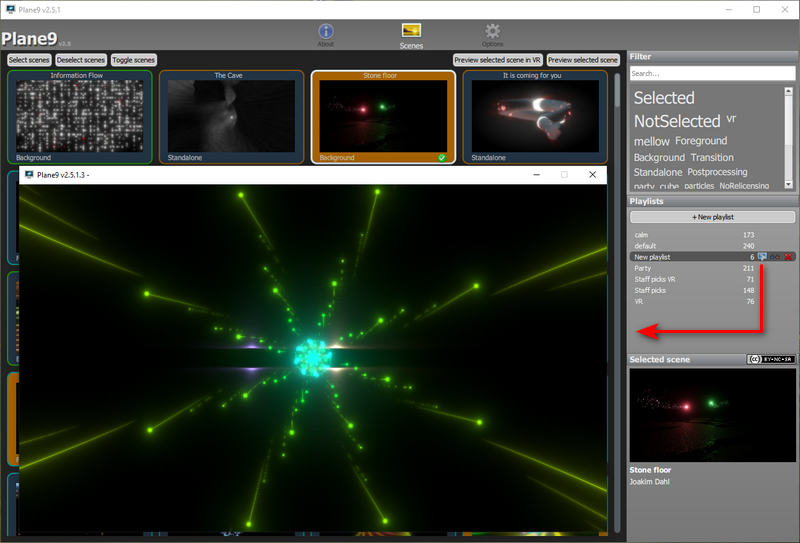
Plane9 is a free and multi-functional software program that allows users to create and customize dynamic visualizations and music visualizers for their computer screens. It offers various visual effects, such as particle systems, fractals, and abstract shapes, which respond to music or other audio inputs. Users can also design their visualizers using the software's built-in editor. Besides, Plane9 can be used for recording video for local audio and outputting the visualized video to your computer. This program is also a screensaver and an assistant for making projects with other software programs like OBS.
Step 1 After downloading and installing Plane9, open the "Configure Plane9" program.
Step 2 Click on "+New Playlist" on the right-hand side and name it as you like.
Step 3 Add your wanted scene to your new playlist by toggling on the grey icon to green. Multiple scenes are available for one playlist.
Step 4 Click on the visualization icon next to the playlist name or open the "Plane9 Windowed" program, you can preview the scenes.
Step 5 Play any Spotify song from the app or the web player, and you will get synchronized visualization.
Step 6 Your selected scenes may show together or randomize, and you are allowed to head to the Options tab and make other settings.
For detailed usage, you may refer to this tutorial video for Plane9.
Compatibility: Windows 10 & macOS 10.13 and above
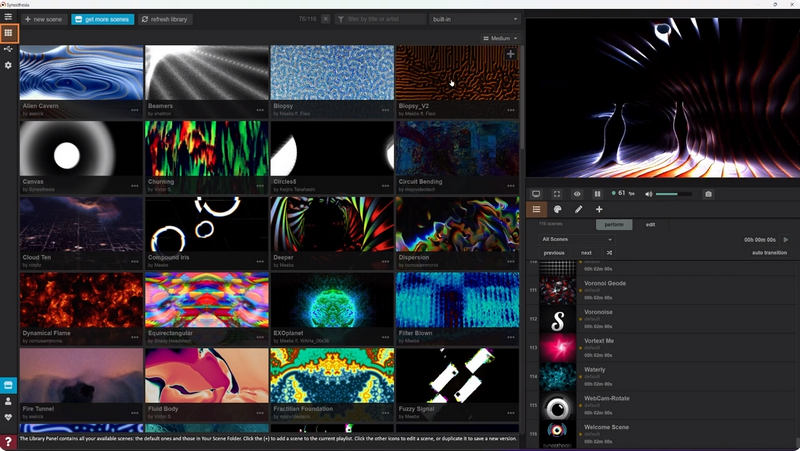
Synesthesia is the combination of professional live music visualizer and VJ software. It claims to allow anyone to harness the power of shaders to create mind-blowing visual experiences in real-time. This software program is designed with advanced algorithms and rich features for visualizing audio, editing videos, and outputting videos. Its library provides kinds of scenes, you can pick any of them for your Spotify music. Additionally, you are entitled to various features and functions to create your video. This program offers a trial version and a full version with a license.
Step 1 Open this program on your computer.
Step 2 Go to the left bar, select Settings > Audio > Audio Device, and choose your preferred audio input.
Step 3 Play Spotify music with the app or web player.
Step 4 Go to the left bar and select the Library tab, where you can pick your preferred scene by clicking on the "+" icon in the upper right.
Step 5 The visual reacts to audio automatically, and then you can make the other editings as needed.
Compatibility: Windows 10 and above
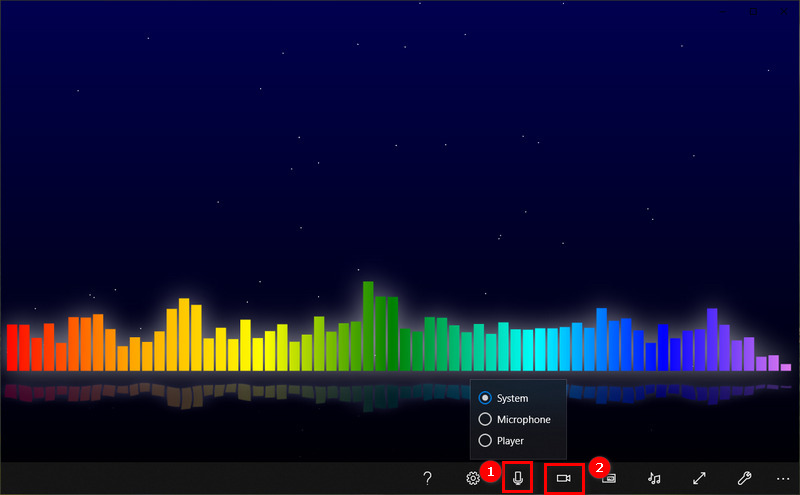
Kauna is a free-to-download desktop app that renders any sound reproduction in the system. It can also capture audio from a microphone. While detecting and reading audio, it generates visuals and synchronizes on the screen. This visualizer offers various effects, settings for sound level sensitivity, automatic change of visualizations on a timer, selection of the sound card, and other customizable visualizations. This app offers both free and premium visualizations and you can pick your type as needed.
Step 1 Install it from the Microsoft Store and click to open it.
Step 2 Click on the microphone icon from the bottom bar, then select an audio source - System, Microphone, Player.
Step 3 Click on the video icon and choose a visualization from over 40 options.
Step 4 Play Spotify songs with the app or web player and enjoy wonderful visualization.
Compatibility: Android
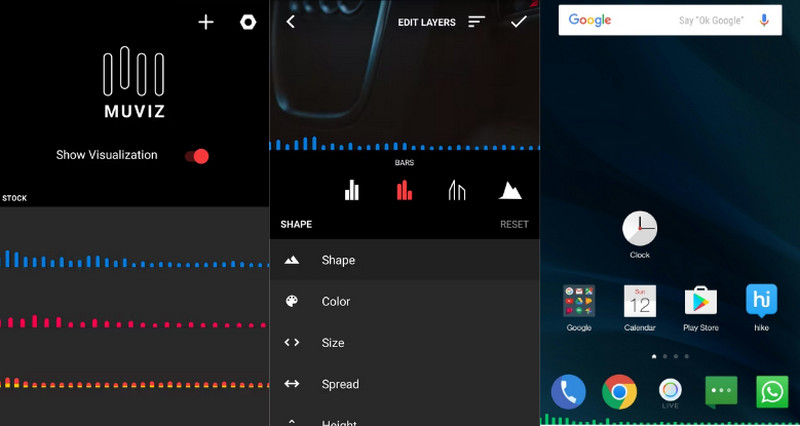
Muviz is a free audio visualizer for the mobile end and has obtained millions of downloads and upvotes. It claims a first-of-its-kind app that displays music visualization on a mobile phone. This app reads the audio and synchronizes the visualizations on your phone's navigation bar or status bar while you are listening to your favorite music from your favorite apps, including Spotify. Users can pick their preferred scenes and customized effects with this app.
Step 1 Open Muviz on your phone, and scroll down to pick your wanted graphics.
Step 2 Edit the graphics to your liking with the intuitive tools, including shapes, color, size, etc.
Step 3 Open your Spotify app and play music, you will see synchronized visualizations on your phone screen.
Compatibility: Windows 8.1 / 8 / 7 / Vista / XP
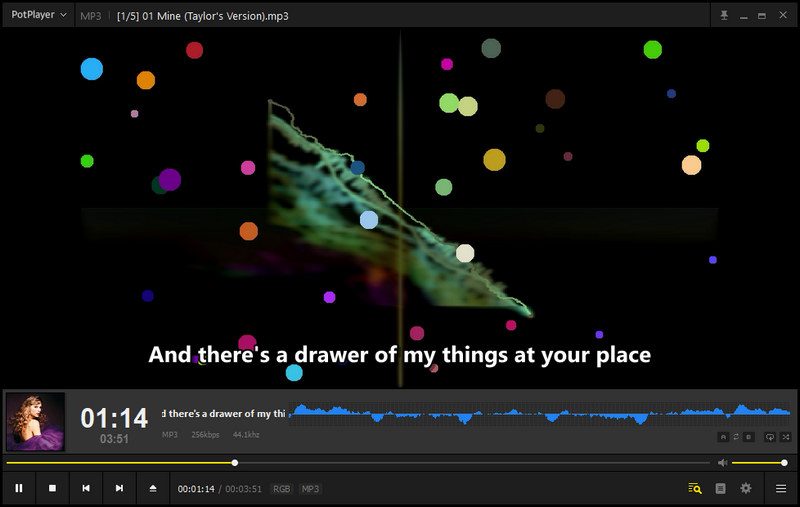
PotPlayer is a free-to-use multimedia player for audio and video, as well as a handy Spotify music visualizer. This free-to-use program allows you to visualize your audio with various effects. Besides, PotPlayer offers a wide range of features, including support for various subtitle formats, playback customization options, screen capture capabilities, and audio and video processing filters. The player also provides a smooth, high-quality playback experience and has gained popularity among users for its robust functionality.
Step 1 Run PotPlayer on your Windows PC.
Step 2 Drag and drop your Spotify audio right into the blank space, and the song is played. (👉 How to download Spotify music? See Part 4.)
Step 3 Click on "PotPlayer" in the upper left, and select "Visualization > Enable visualization for audio tracks" from the drop-down list.
Step 4 Select "Visualization > Visualization settings", and pick your wanted visualization mode to get different effects.
Compatibility: Windows, Linux, macOS, Unix, iOS, Android
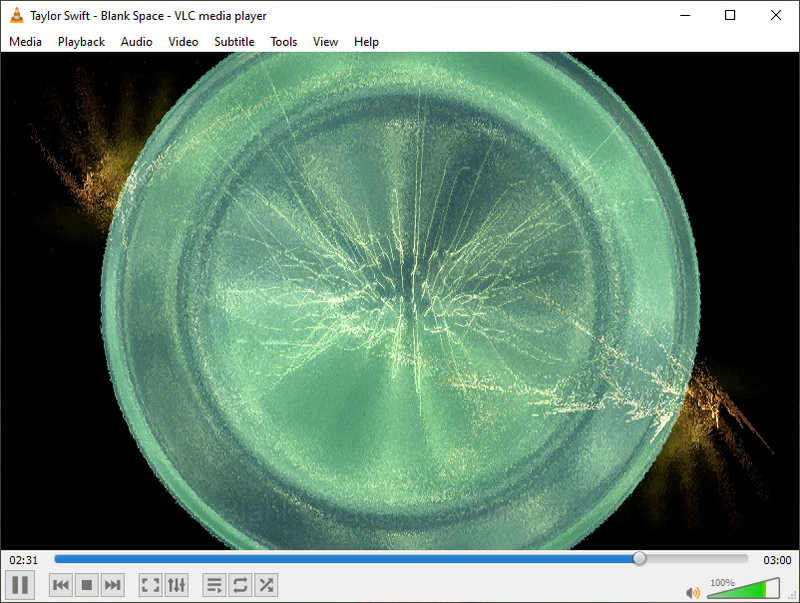
VLC (VideoLAN Client) is a free and open-source multimedia player and streaming media server software. It is capable of playing various audio and video formats and can also be used for streaming media over networks. Besides, VLC is also an easy-to-use music visualizer for Spotify. It offers you several visualized scenes and you can pick your wanted effects.
Step 1 Download and install VLC on your computer, then click to run it.
Step 2 Drag and drop your Spotify audio to its blank space and VLC will play it.
Step 3 Click on Audio on the menu bar and select Visualization from the drop-down list, then select a scene to your liking.
Compatibility: Windows, macOS, iOS
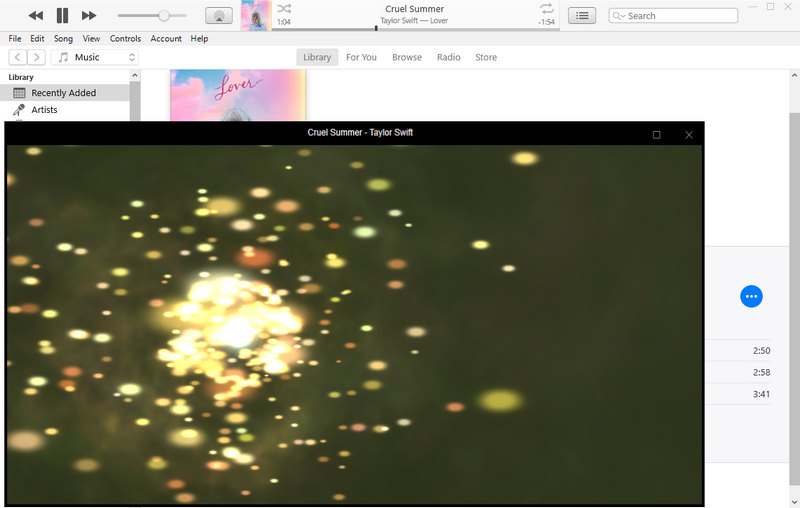
iTunes is a media player, media library, and mobile device management application developed by Apple Inc. While it is primarily used to manage and play digital music, movies, and television shows, iTunes does include a visualization feature that creates dynamic visual effects synchronized with the audio playback. Any audio, including Spotify audio, which plays within iTunes has its visualizations.
Step 1 Download and install iTunes on your computer, then click to run it.
Step 2 Move the upper left and select "File > Add File to Library".
Step 3 Select your Spotify audio and confirm to upload it to iTunes.
Step 4 Play your Spotify audio on iTunes, then select "View > Visualizer > Show Visualizer", and you will see visualizations on a popup.
👉 You may also need How to Export Spotify Playlists to iTunes?
Compatibility: Windows 7 and above
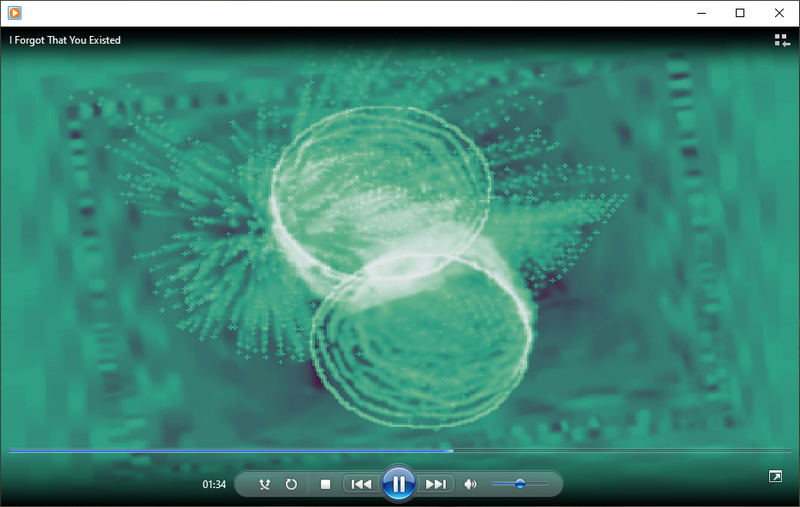
Windows Media Player is a media player software developed by Microsoft. It is primarily designed for playing various types of media files including videos, audio files, viewing images, and burning CDs on Windows operating systems. What is less known is that the WMP program provides rich visualizations and supports downloading visualizations.
Step 1 Open the Windows Media Player on your PC.
Step 2 Drag and drop your Spotify audio into this program, and play it.
Step 3 Move to the bottom right corner and click on Switch to Now Playing.
Step 4 Right-click on the window, choose "Visualization", select "Bars and Waves" or "Battery", and then pick your preferred visualizations.
After reading the previous parts, you are displayed with 13 free Spotify music visualizers in total. You can find that, some of them visualize the now streaming Spotify music, while some of them show the visualizations of local audio and support downloading visualization. Visualizing Spotify music online is quite convenient, but brings some problems. The biggest one is that the visualization is disturbed by online streaming and network connections. How to lower the impact of Spotify music visualization brought by the unstable network? The best way is to download Spotify music.
TuneCable Spotify Music Converter is quite an outstanding tool that is designed especially for Spotify users to download any Spotify tunes and convert Spotify music to MP3, AAC, and other plain formats. While perfectly retaining the original quality of up to lossless FLAC, TuneCable can losslessly keep ID3 tags and Spotify lyrics. Additionally, this easy-to-use program offers rich customizations and allows you to better manage Spotify music files. With this tool, you can extract audio from Spotify, play lossless Spotify music anytime, and import Spotify tunes to music visualizers for wonderful visualizations and video editing.

TuneCable Spotify Downloader
Step 1 Run TuneCable Spotify Downloader on Your PC
Download and install TuneCable Spotify Downloader on your Windows or Mac computer, and then click to open it. You are greeted with two options in the first interface, where you can choose to download Spotify music from the Spotify app or the web player. When you choose the former, you should have the Spotify app on your computer. Regardless of the audio source, the original audio quality is accessible.

Step 2 Add Spotify Music to TuneCable
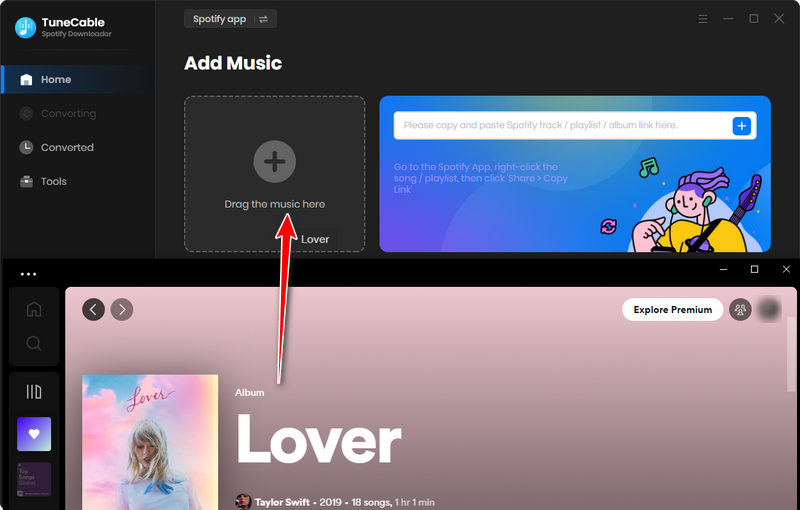
If you select to download music from the Spotify app, it prompts at once. Ensure your account is logged in. Both free and premium accounts are fine. Next, drag and drop your wanted Spotify music from the app to TuneCable.
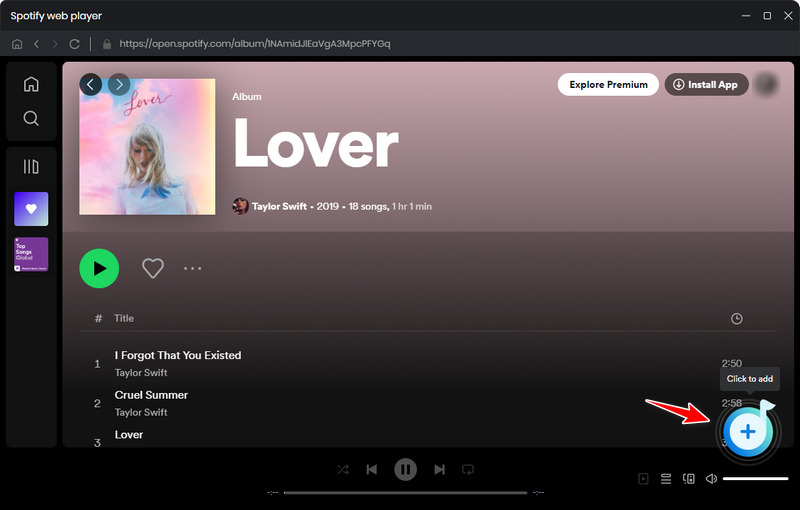
When you choose to get Spotify music files from the web player, the web player pops up as an independent window. Follow the tip to sign into your account. Then browse and open your target playlist or album, and click on the "+" icon in the lower right.
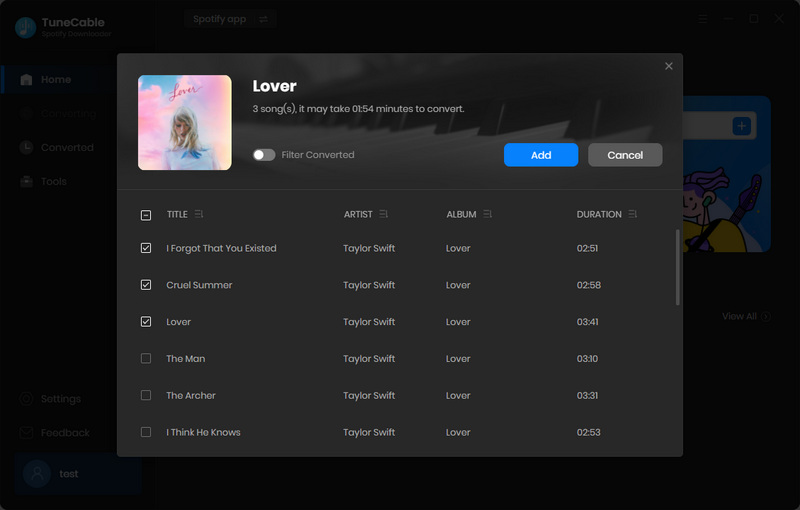
Following is a pop-up window on TuneCable. You will see that all the tracks are selected. If you want just several items, deselect all and pick as you wish. Confirm your choice with the "Add" button. To add multiple playlists or albums, repeat this step.
Step 3 Customize the Output Settings for Spotify Music
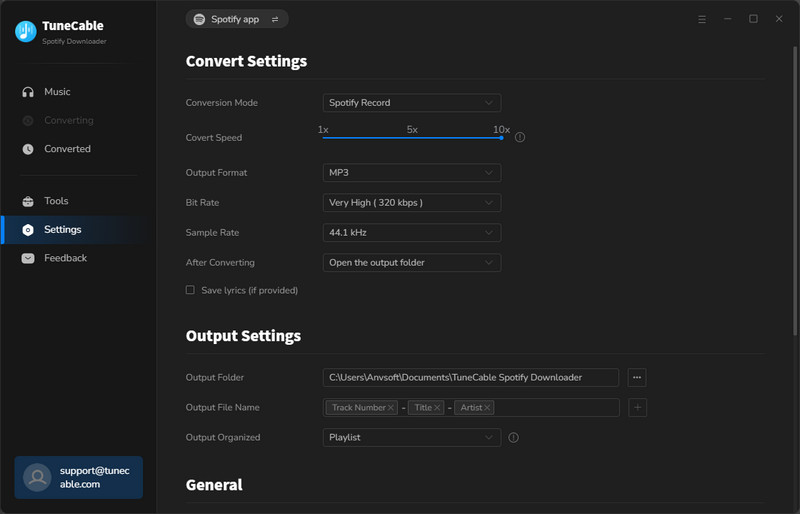
TuneCable, as a well-developed program, wisely offers you kinds of customizations. On the "Settings" panel, you can pick an output format, output quality, and output folder, name the files in batch, and sort them into folders.
Step 4 Download Spotify Music to Local Storage
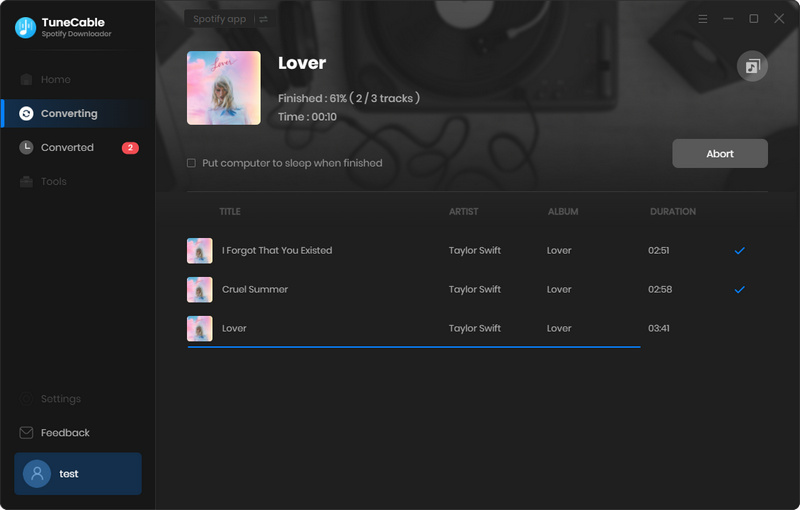
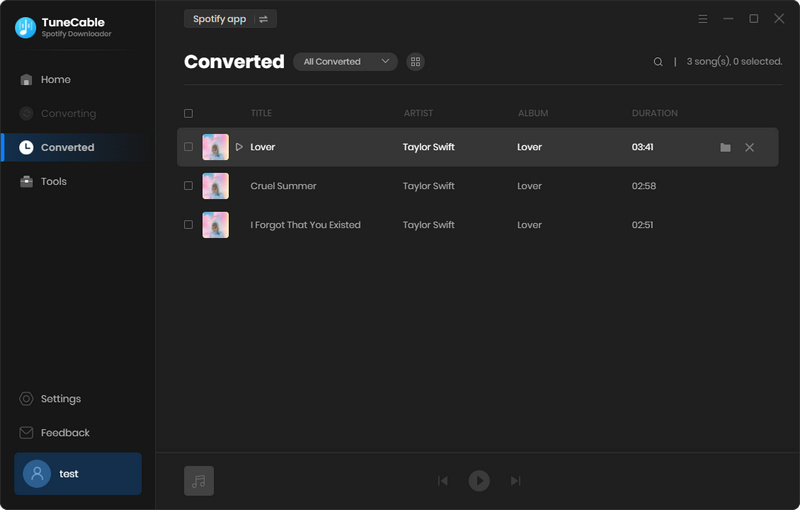
Go back to the Home tab and simply click on the "Convert" button to convert Spotify music to local audio files. Once the conversion is done, the output folder appears automatically. You can additionally go to the "History" tab to view your download history and click on the file icon to open the output folder.
After going through this article, you get the top 13 free Spotify music visualizers, including online and desktop Spotify visualizers. You can pick your wanted online tool, desktop app, or mobile app from them. While some of the visualizers are for online streaming Spotify music, others work by reading your local Spotify audio. But as we mentioned above, online streaming is affected by the network connection a lot. In this case, you may use the TuneCable Spotify Downloader to convert Spotify music to local audio. Pick this powerful tool and unlock more uses in Spotify music visualization!
 What's next? Download TuneCable Spotify Downloader now!