

TuneCable iTadal Music Converter
 >
How To >
Tidal Music Tips >
In the past, we were accustomed to saving data onto SD cards or USB flash drives. However, with the advancement of technology, our reliance on the Internet has been steadily increasing. As a result, there is an ever-growing need for storage space. Numerous cloud disk services have emerged to address this issue. The primary objective of these services is to assist us in overcoming the problem without having to endure the risk of losing data when the storage capacity of our devices and computers becomes insufficient. OneDrive is one of the more prevalent cloud disk services available.
Tidal Music has made meticulous efforts to enhance sound quality over the years, continuously improving and striving for excellence. This has also garnered a significant following among users worldwide, making it a formidable contender among various streaming music platforms. However, superior sound quality often necessitates more disk space requirements. When your local storage is inadequate, you may consider uploading your cherished collection of Tidal Music tracks, albums, and playlists to a cloud disk service like OneDrive. Since you are merely experiencing a temporary shortage of space, you do not wish to permanently lose these Tidal Music tracks. Of course, we are aware that Tidal Music imposes numerous restrictions on song transmission. Can this idea be realized? The answer is affirmative. Let's conduct the concrete plan step by step.

Why can't I upload Tidal Music tracks to OneDrive? A series of questions jumped into your mind after all unsuccessful attempts of uploading the Tidal Music library to OneDrive. Following this part, you may realize why you misfired.
As an online storage service, OneDrive assists users in backing up photos, documents, and other media, while providing support for creating and editing certain Microsoft Office files. Backed by Microsoft, OneDrive stands out among cloud storage services. Moreover, OneDrive is equipped with practical tools such as automatic backup for photo albums and online Office functionality. Users can access, edit, and share files anytime, anywhere, on any platform. OneDrive is determined to be a convenient, secure, and efficient cloud storage service conducive to data storage and management.
Unfortunately, there is no direct method to accomplish this task. It is important to note that once you have located the Tidal Music files on your device or computer, it is realistic to be aware that these files are cached and cannot be moved or transferred due to their encryption. However, if you previously downloaded Tidal Music tracks as local files by following the steps outlined in part 2, you will be presented with the option to upload your Tidal Music library to OneDrive.
The answer is No. Streaming music directly from OneDrive is not currently an option. When you click on the uploaded songs, you will only have the option to download them. Nevertheless, becoming a subscriber to Microsoft's Xbox Music service makes it possible to stream music from OneDrive for free. But Xbox Music service costs extra. It is important to note that when uploading music to OneDrive, it must be placed in the designated Music folder in order to be recognized. Simply uploading music to any old folder within OneDrive will not work.
The local audio files encoded in these audio formats can be uploaded to OneDrive: MP3, AAC (M4A), WAV, and WMA
Tidal Music files are typically encoded in FLAC format, which is not directly compatible with OneDrive. Additionally, Tidal encrypts their cached files, causing challenging trouble when transferring or even adding them to other applications. In order to upload Tidal audio files to OneDrive, you will need to convert them to MP3 or WAV format first. This process will be covered in detail in part 2.
At present, OneDrive stops you after uploading 50,000 files. And it's essential to note that each file you upload counts towards your overall storage capacity on OneDrive. In addition to the limit on file number, reaching the standard 15GB of storage space will also force you to quit uploading more files. Additionally, you will avail of an additional 100GB of storage space under the membership of Xbox Music Pass.
Encryption imposed on the Tidal Music tracks necessitates the aid of a professional yet convenient tool - TuneCable iTadal Music Converter. It turns Tidal songs into local MP3 or WAV files that can be uploaded to OneDrive or other apps without difficulties.
If you are skeptical about how TuneCable Tidal Music Downloader archives your Tidal files after the conversion, it's time to have relief. This program puts efforts to make every user including newbies pick it up quickly. There are multiple selectable options (Playlist, Album, Artist, etc.) in the "Output Organized" setting, which bins your worries about a waste of time on locating the downloaded Tidal songs. Furthermore, preserving the full ID3 tags (title, artist, album, genre, track number, year, etc.) after the conversion levels up the user experience.
TuneCable Tidal Music Downloader decrypts Tidal Music tracks in multiple formats including MP3 and WAV supported by OneDrive. To speed up the conversion, it supports converting hundreds of songs and multiple albums or playlists at up to 10x speed without sacrificing the audio quality.
Let's check how it converts the Tidal songs to OneDrive-supported files in detail.
Key Features of TuneCable Tidal Music Converter:
Step 1: Choose A Music Source on the Main Interface
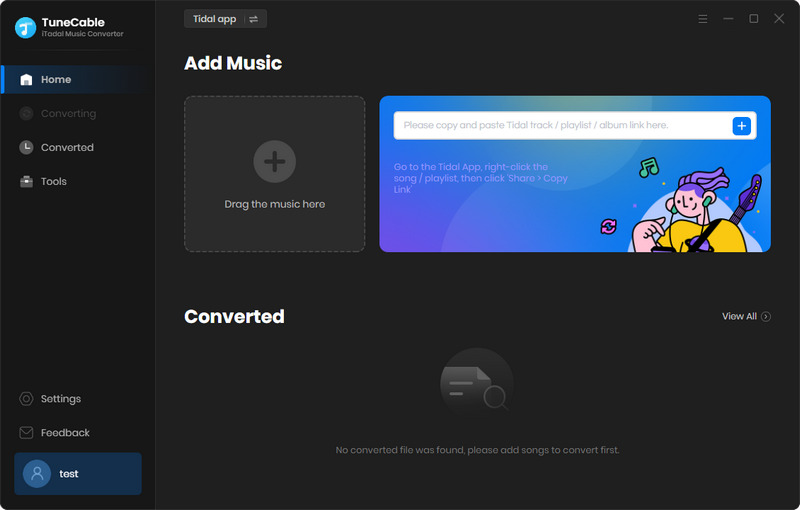
Download and install the TuneCable Tidal Music Converter on your Windows PC or Mac. Choose the right version to install it properly. After the installation, launch this program. On the primary interface, you have two options. The music source can be the Tidal Music app or the Tidal Music web player.
Recording music from the Tidal Music app when you desire to extract the max-quality music(HiRes music). If the HiFi quality is fine, you can opt for downloading music from the Tidal Music web player, which is superior in conversion speed.
The Tidal Music app and built-in Tidal Music web player will pop up automatically once you click on the corresponding option.
Step 2: Select Your Preferred Tidal Songs
Download music from the Tidal app: Locate what you want in the Tidal Music app and go to the title, drag and drop it to the TuneCable designated area. Any song, album, or playlist can be added.

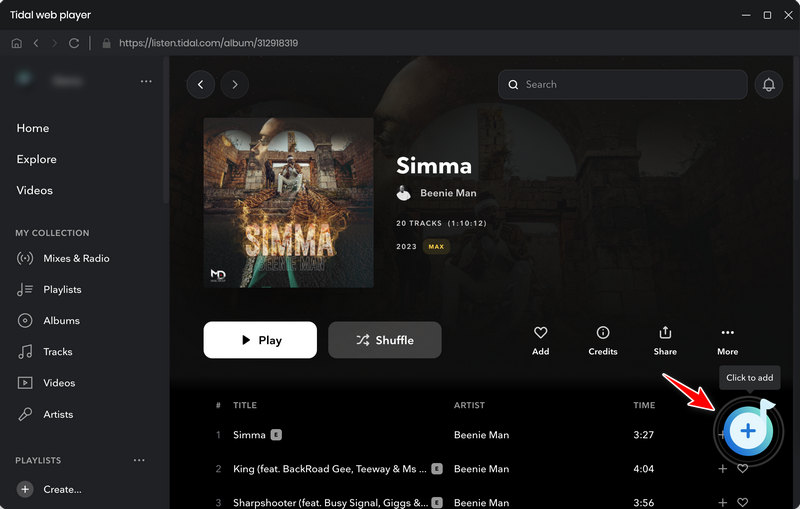
Download music from the Tidal web player: Locate a wanted song, album, or playlist, and then click on it to go to its information page. Find a "Click to add" button situated in the lower right, and click on it.
Step 3: Add the Selected Tidal Songs to the Task List
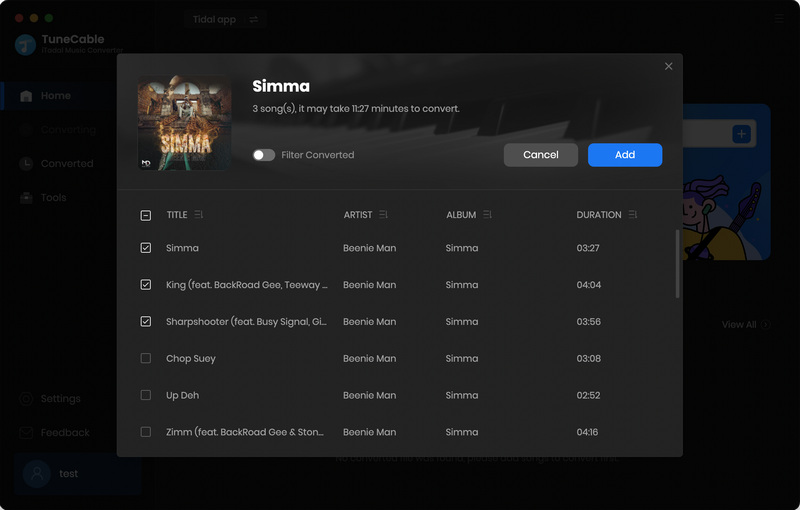
A few seconds later, TuneCable parses the link and loads available songs. Pick the items you need and click on the "Add" button to add them to the download list. Above the list, tick off the check box of "Title", you can deselect all tracks.
Step 4: Adjust the Output Parameters
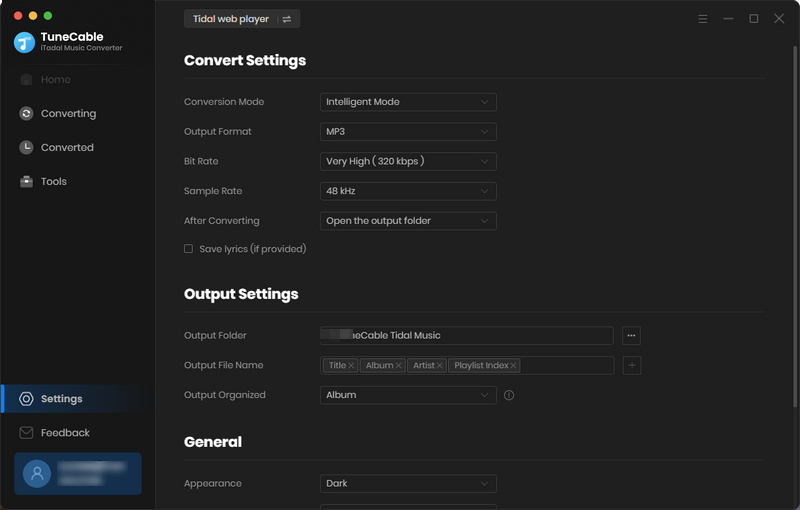
Before proceeding, navigate to the "Settings" section. Here, you can make informed decisions regarding the output format, sample rate, bit rate, output file name, output organized method, output folder, and other related settings.
To smoothly upload the Tidal Music files to OneDrive, it's better to set "MP3" as the output format. OneDrive has limited storage space. Though the WAV format is compatible with OneDrive, it takes too much storage space to be a proper option.
After all changes, go back to the "Home" column to continue the conversion.
Changeable Output Settings:
Step 5: Convert Tidal Music to Local MP3 Files
There is an "Add More" button that allows for downloading more tracks or playlists at a time. Click it to prompt a pop-up window that allows you to add more songs from other playlists or albums.
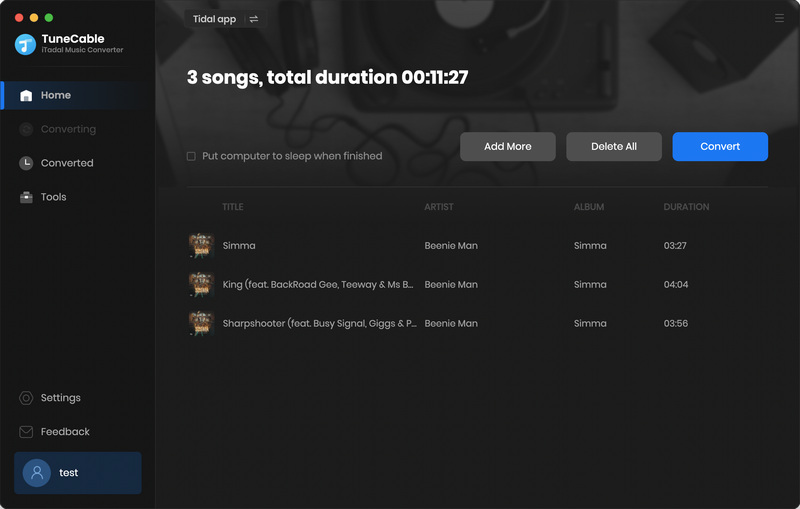
After you have included all the essential items, simply press the "Convert" button to start the conversion process. The output folder will automatically open, enabling you to access and view the downloaded Tidal songs on your local device. You are free to use these songs for personal purposes, such as uploading them to OneDrive.
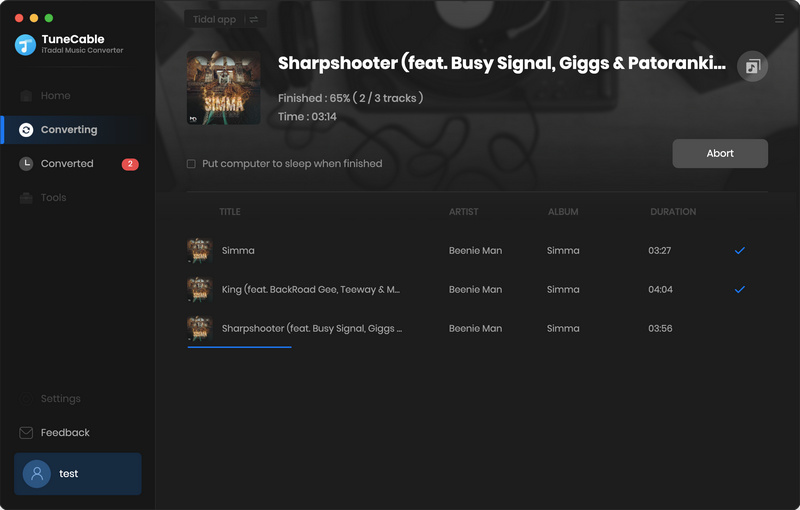
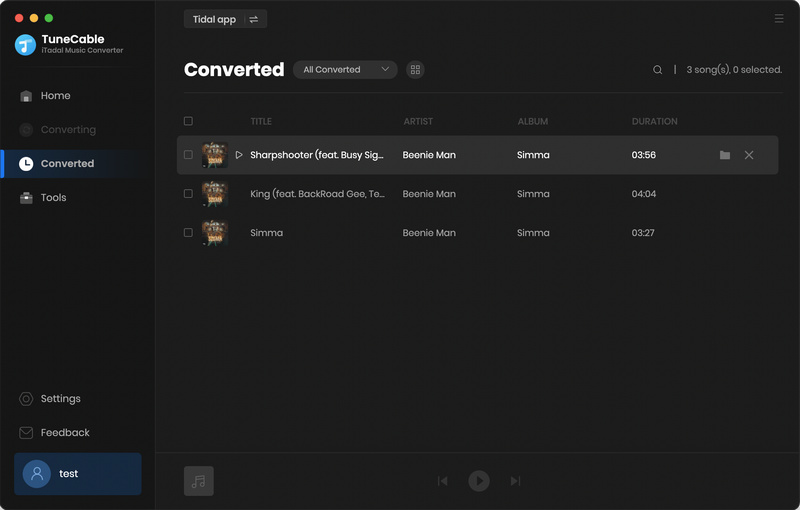
Here comes the final section. After converting the Tidal Music files to MP3 formats by following the steps in the previous part, you can upload them to OneDrive without restriction. Let's take a look at how to upload the converted Tidal Music files to OneDrive for full backup.
Step 1: Navigate to the official OneDrive website and download the app onto your computer. (Alternatively, you can access the online cloud drive through your web browser.)
Step 2: Launch the app and sign in using your Microsoft Outlook credentials.
Step 3: Locate the folder labeled "Music" or another folder you prefer and double-click to open it.
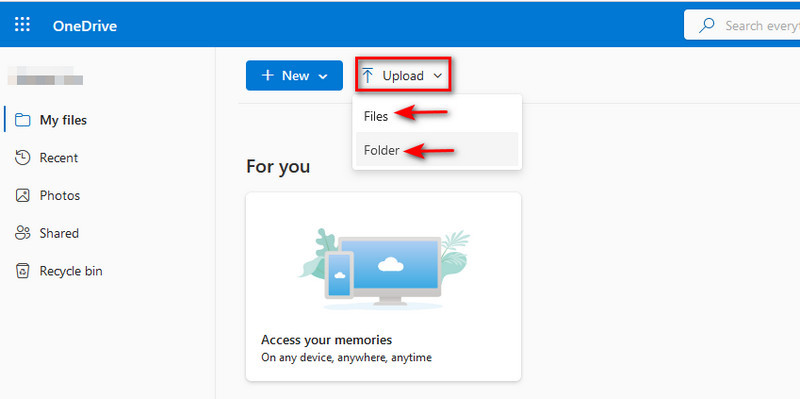
Step 4: To upload your downloaded Tidal music files to OneDrive, simply click on the "Upload"![]() button in the upper left, and then choose to upload "Files" or "Folder".
button in the upper left, and then choose to upload "Files" or "Folder".
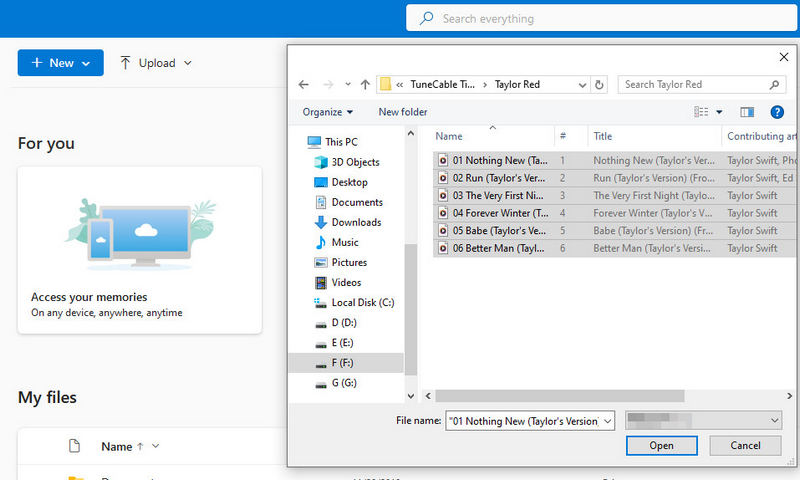
Step 5: In the pop-up Windows Explore, locate where the converted Tidal songs are stored. Select your desired tracks or a music folder and click on "Open" to add the Tidal songs to OneDrive.
With that, you can now effortlessly access your Tidal music on OneDrive whenever you desire and securely store them as permanent backups.
In this article, we have provided a comprehensive guide on how to download Tidal Music files as local audio songs with TuneCable iTadal Music Converter and then upload them to OneDrive for backup purposes. Apart from backing up to OneDrive, these converted Tidal audio files can also serve various other purposes that you may discover, for instance, recording music onto a CD, saving it onto a USB drive, playing it on an audio device, uploading it to a cloud drive, and so on. Start a free trial right now if you like our tips.
 What's next? Download TuneCable iTadal Music Converter now!

Download music tracks from Spotify, Amazon Music, Apple music, YouTube Music, TIDAL, Deezer, etc.

Recover lost 1000+ types of files from disks, partitions, hard drives, SD cards, and other external devices.